Easter Rice Krispie Treats-Easy Festive Fun
Easter Rice Krispie Treats are more than just a nostalgic childhood snack; they’re a whimsical gateway to springtime joy and a delightful centerpiece for any holiday gathering. What is it about these simple, chewy squares that captures our hearts year after year? Perhaps it’s the satisfying crunch followed by that perfect, gooey chew, a textural masterpiece born from just a few humble ingredients. Or maybe it’s the endless possibilities for customization, transforming them into edible works of art that celebrate the season. This year, we’re taking the beloved classic and infusing it with the vibrant spirit of Easter, making our Easter Rice Krispie Treats truly unforgettable. Get ready to create moments of pure, unadulterated happiness, one colorful, marshmallowy bite at a time.
Get Ready for the Ultimate
A Hug in a Square
Ingredients:
- 16 ounces marshmallows (jumbo or mini both work equally well)
- 7 cups Rice Krispies cereal
- 2 tablespoons unsalted butter (for greasing)
- ½ cup unsalted butter (for the treat base)
- 3-4 cups powdered sugar (this controls the sweetness and chegrape juicess)
- ¼ cup milk (whole milk is recommended for richness)
- 1 teaspoon vanilla extract (pure vanilla extract for the best flavor)
- Green food coloring (gel or liquid, adjust for desired shade)
- Easter egg candies (such as mini chocolate eggs or jelly beans, for decoration)
Preparing the Marshmallow Base
The foundation of our Easter Rice Krispie Treats is a perfectly melted marshmallow mixture. This is where the magic happens, transforming crunchy cereal into a delightful, chewy confection. We’ll start by gathering our main ingredients: the marshmallows and the ½ cup of unsalted butter. It’s important to use fresh marshmallows; older ones can sometimes be a little dry and might not melt as smoothly. If you’re using jumbo marshmallows, you can cut them into smaller pieces to help them melt faster and more evenly. This will ensure a consistent texture throughout your treats.
Melting the Marshmallows and Butter
In a large, heavy-bottomed pot or Dutch oven, combine the ½ cup of unsalted butter and the 16 ounces of marshmallows. Place the pot over low heat. It’s crucial to use low heat to prevent the marshmallows from scorching or browning, which can affect the taste and color of the final treats. Stir the mixture constantly with a heat-resistant spatula or wooden spoon. You’ll notice the butter will melt first, followed by the marshmallows. Keep stirring gently until the marshmallows are completely melted and the mixture is smooth and creamy. This process typically takes about 5-10 minutes. Once everything is melted and smooth, remove the pot from the heat immediately to prevent further cooking.
Incorporating the Cereal and Flavor
Now that we have our luscious, melted marshmallow mixture, it’s time to add the star of the show: the Rice Krispies cereal! Gently fold in the 7 cups of Rice Krispies cereal into the melted marshmallow mixture. Use your spatula to coat every single piece of cereal evenly. The goal is to get every crispy bit coated in that sweet, sticky goodness. This is also a good time to stir in the 1 teaspoon of vanilla extract. The vanilla adds a wonderful depth of flavor that complements the sweetness of the marshmallows beautifully. Make sure the vanilla is fully incorporated before moving to the next step. The mixture will start to become quite thick and sticky at this stage.
Creating the Easter Egg Coating
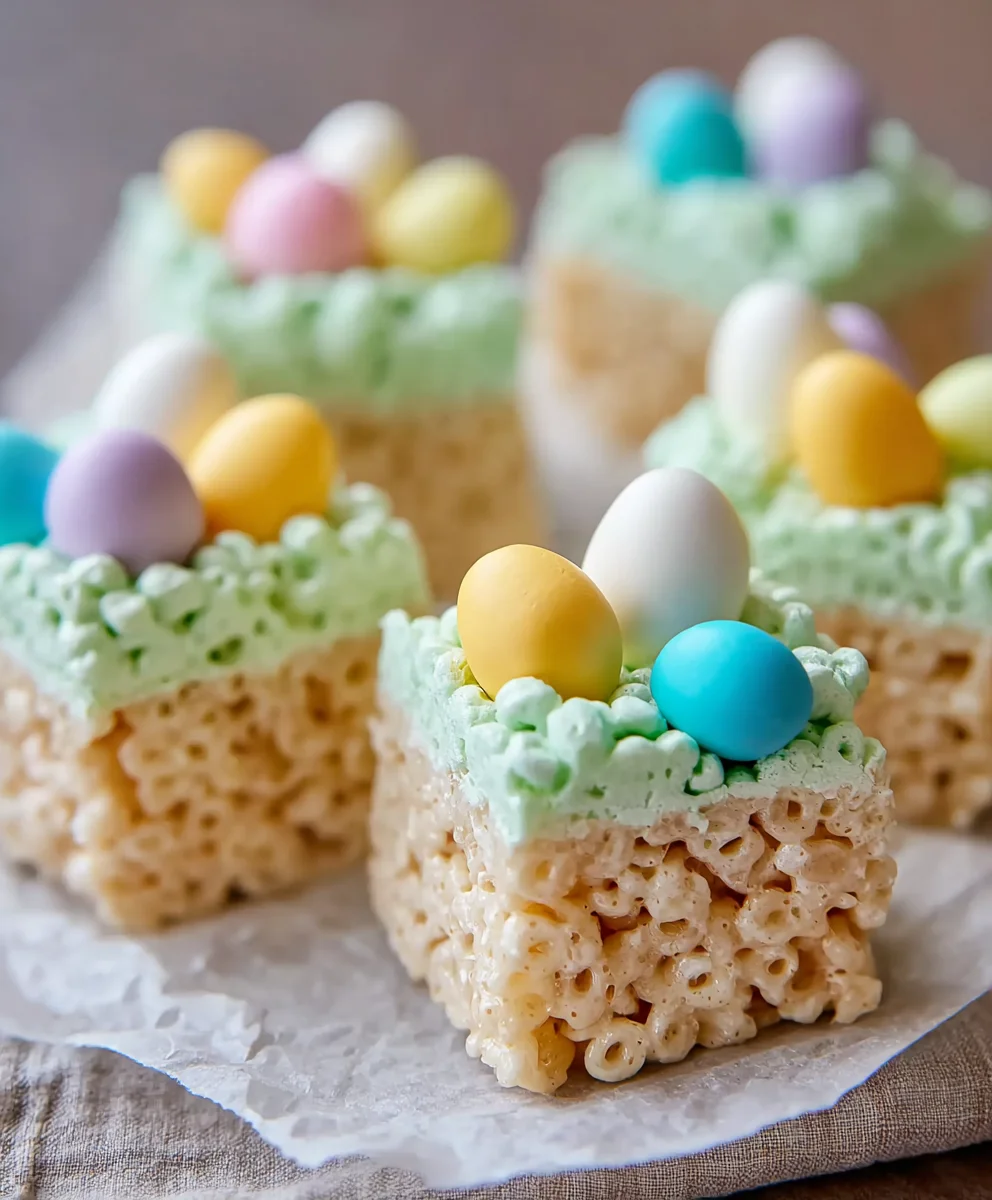
This next phase is what gives our Easter Rice Krispie Treats their festive charm. We’ll be making a simple, sweet glaze that’s perfect for dipping and decorating. In a medium bowl, combine 3 cups of the powdered sugar with the ¼ cup of milk and the 1 teaspoon of vanilla extract. Whisk these ingredients together until you have a smooth, pourable glaze. If the glaze seems too thick, you can add a tiny bit more milk, a teaspoon at a time, until you reach your desired consistency. Conversely, if it’s too thin, add a little more powdered sugar. Now, add a few drops of the green food coloring to the glaze. Start with a small amount and add more until you achieve a vibrant Easter green. This hue will make our treats look like beautiful, decorated Easter eggs.
Assembling and Decorating the Treats
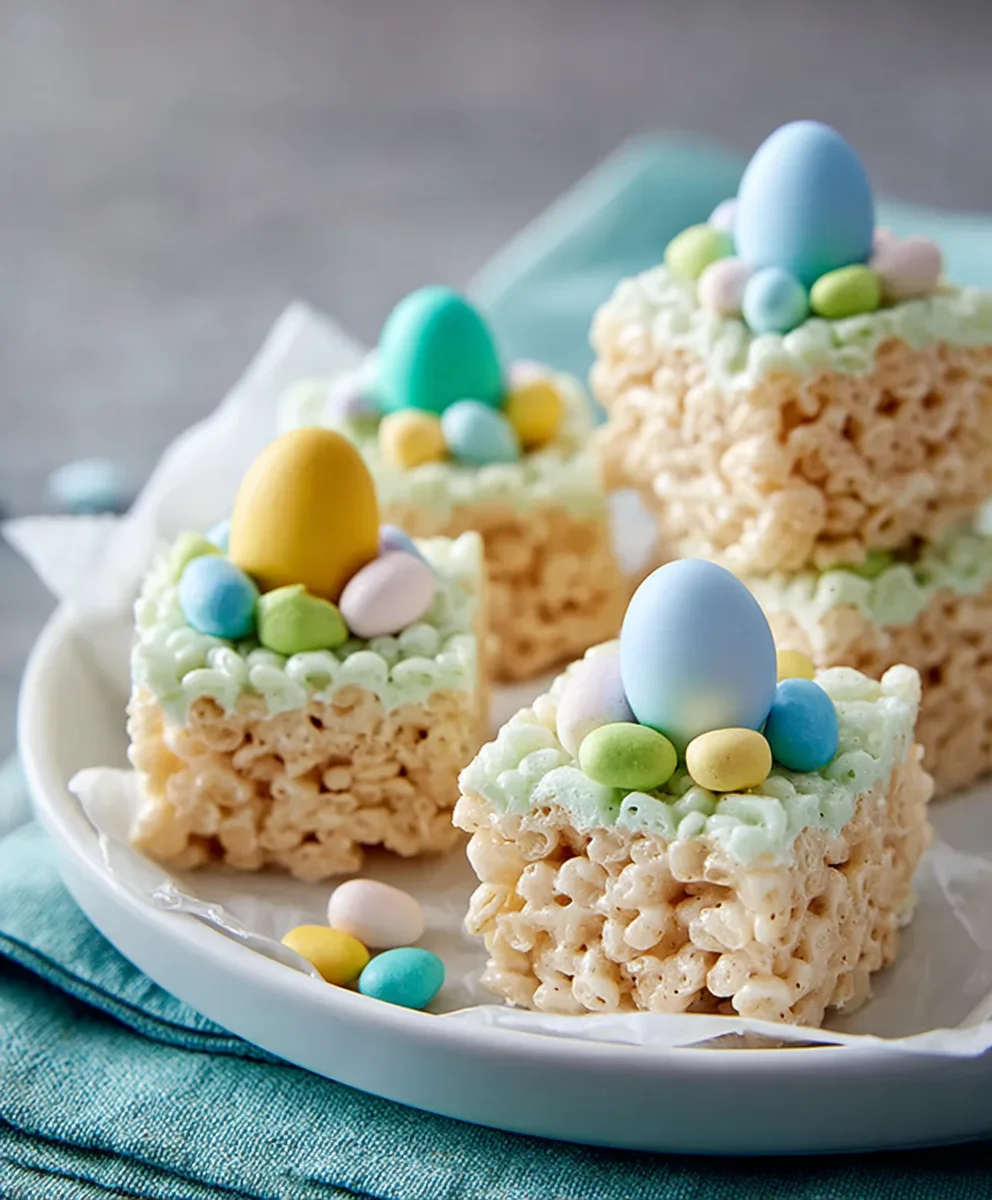
This is where your creativity shines! First, prepare your workspace. Line a large baking sheet or a 9×13 inch baking pan with parchment paper or wax paper. You can also lightly grease the parchment paper with the reserved 2 tablespoons of unsalted butter to prevent sticking. Take portions of the Rice Krispie mixture and shape them into desired sizes and forms. You can create individual bars, circles, or even freeform shapes. A slightly greased hand or a greased spatula can help prevent the mixture from sticking to you. Once you have your shapes, you can either dip them partially into the green glaze, drizzle the glaze over them, or spread a thin layer of glaze on top. While the glaze is still wet, carefully place your Easter egg candies (mini chocolate eggs or jelly beans) onto the glazed surface. Arrange them creatively to mimic the look of decorated Easter eggs. Let the glazed treats sit undisturbed on the parchment paper until the glaze is completely set and hardened. This usually takes about 30-60 minutes at room temperature, or you can speed up the process by placing them in the refrigerator for about 15-20 minutes.
Conclusion:
And there you have it – your very own batch of delightful Easter Rice Krispie Treats! We hope you enjoyed this simple yet incredibly rewarding recipe. These treats are not only a crowd-pleaser for any Easter gathering but are also a fantastic activity to enjoy with kids during the holiday. Their chewy, gooey texture and sweet crunch are truly irresistible, making them the perfect addition to your Easter dessert table. Don’t be afraid to get creative with your decorations! Consider them the perfect canvas for your Easter-themed artistry.
These Easter Rice Krispie Treats are wonderfully versatile. Serve them as a standalone dessert, alongside a festive brunch spread, or even package them up as charming edible gifts for friends and family. For a fun twist, try adding a sprinkle of edible glitter or some pastel-colored candy melts for extra flair. You could also fold in mini chocolate chips or chopped nuts for added texture and flavor complexity.
Remember, the beauty of this recipe lies in its simplicity. Don’t stress about perfection; embrace the fun of making and sharing these sweet delights. We encourage you to experiment with different shapes and colors to truly make them your own this Easter season!
Frequently Asked Questions:
Can I make these Easter Rice Krispie Treats ahead of time?
Yes, absolutely! Easter Rice Krispie Treats can be made up to 2-3 days in advance. Store them in an airtight container at room temperature. For best results, avoid refrigerating them, as this can make them too hard.
How can I get cleaner cuts for my Easter Rice Krispie Treats?
To achieve clean cuts, lightly grease your knife or a pizza cutter with cooking spray or butter before slicing. For perfectly even squares, press the mixture firmly and evenly into your prepared pan.
Easter Rice Krispie Treats-Easy Festive Fun
Easy and festive Rice Krispie treats perfect for Easter, decorated to look like colorful Easter eggs.
Ingredients
-
16 ounces marshmallows
-
7 cups Rice Krispies cereal
-
2 tablespoons unsalted butter (for greasing)
-
½ cup unsalted butter (for the treat base)
-
3-4 cups powdered sugar
-
¼ cup milk
-
1 teaspoon vanilla extract
-
Green food coloring
-
Easter egg candies (such as mini chocolate eggs or jelly beans)
Instructions
-
Step 1
Gather ingredients. Cut jumbo marshmallows into smaller pieces if using, for faster melting. This ensures a consistent texture. -
Step 2
In a large pot over low heat, combine ½ cup unsalted butter and 16 ounces marshmallows. Stir constantly until marshmallows are completely melted and the mixture is smooth and creamy. Remove from heat immediately. -
Step 3
Gently fold in 7 cups of Rice Krispies cereal into the melted marshmallow mixture, ensuring all cereal is evenly coated. Stir in 1 teaspoon of vanilla extract. -
Step 4
Prepare the Easter egg coating: In a medium bowl, combine 3 cups powdered sugar, ¼ cup milk, and 1 teaspoon vanilla extract. Whisk until smooth and pourable. Add green food coloring until desired shade is reached. Adjust consistency with more milk or powdered sugar if needed. -
Step 5
Line a baking sheet or 9×13 inch pan with parchment paper, lightly greased with 2 tablespoons unsalted butter. Shape the Rice Krispie mixture into desired forms (bars, circles, etc.). -
Step 6
Dip or drizzle the shaped treats with the green glaze. While the glaze is wet, place Easter egg candies onto the surface to resemble decorated Easter eggs. Let the glaze set completely at room temperature or in the refrigerator.
Important Information
Nutrition Facts (Per Serving)
It is important to consider this information as approximate and not to use it as definitive health advice.
Allergy Information
Please check ingredients for potential allergens and consult a health professional if in doubt.