Easter Dirt Cups-Fun & Easy Dessert Recipe
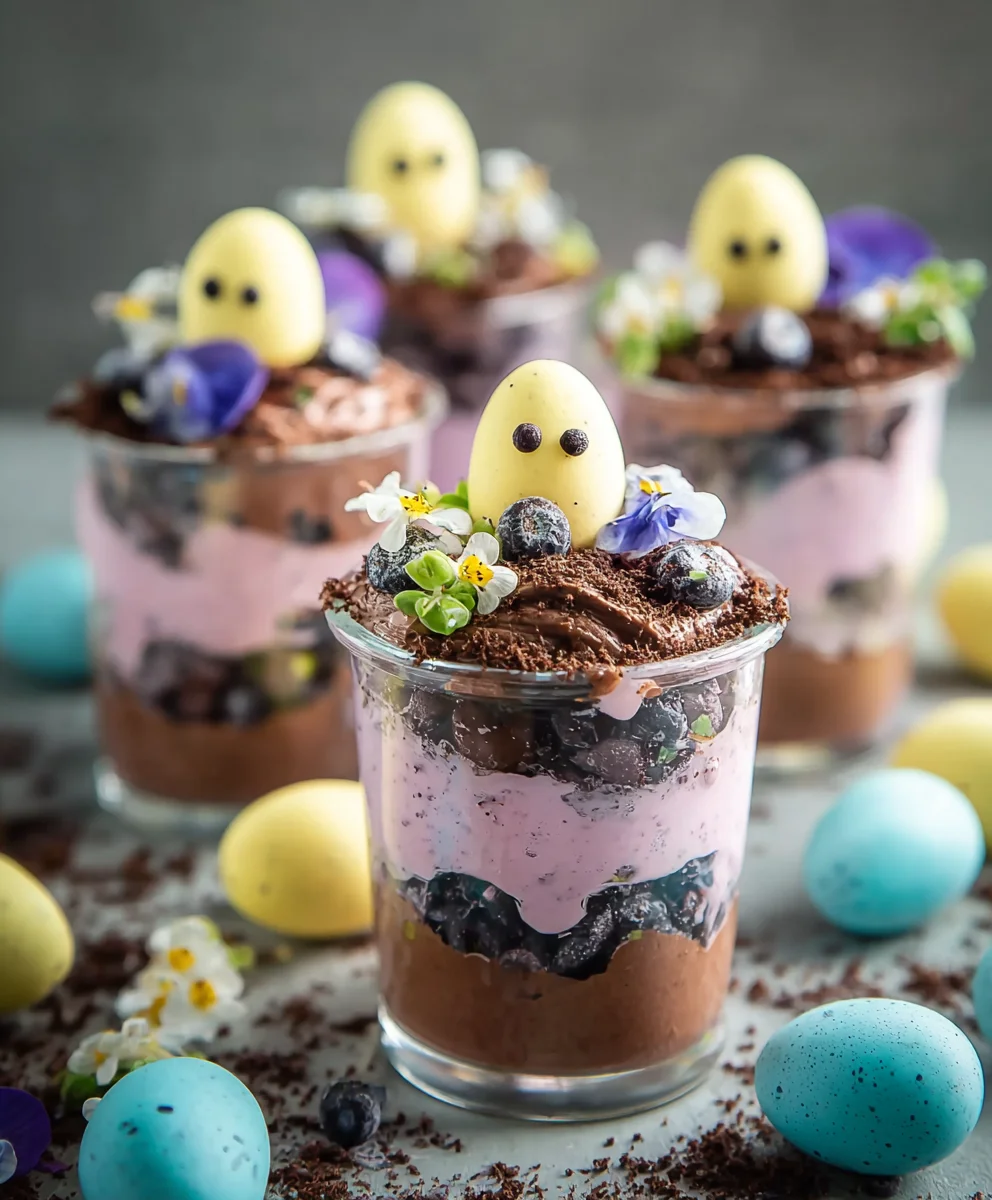
Easter Dirt Cups are a whimsical and utterly delightful treat that has become a springtime staple for good reason. Imagin extracte this: layers of rich, chocolatey pudding, crum extractbled cookie “dirt,” and adorable candy creations, all nestled together in a clear cup, looking like a miniature garden ready for a chocolate bunny to emerge. It’s no wonder these are a massive hit with both kids and adults alike; they capture the playful spirit of Easter with every spoonful. What makes these Easter Dirt Cups so special is their incredible versatility. You can customize the pudding flavor, the type of cookie you crush, and of course, the adorable Easter candy decorations. From jelly bean “flowers” to gummy worm “critters,” the possibilities for creativity are endless. This recipe isn’t just about a delicious dessert; it’s about creating a fun, edible craft that brings smiles and a sense of occasion to your Easter celebrations.

Ingredients:
- 1 package (3.9 oz.) vanilla instant pudding mix
- 2 cups cold milk
- 1 container (8 oz.) Cool Whip, thawed
- Food coloring (suggested: purple and pink)
- 1 package Oreo cookies, finely crushed with filling removed
- Shredded coconut
- Candy eggs (like mini egg candies)
- Peeps marshmallow chicks or bunnies
- Food coloring for coconut
Preparing the “Dirt” Base
Making the Pudding
Our first step is to create the rich, chocolatey “dirt” that will form the base of our Easter Dirt Cups. In a medium-sized bowl, combine the vanilla instant pudding mix with the 2 cups of cold milk. Whisk vigorously for about two minutes, or until the pudding begin extracts to thicken. Instant pudding is wonderful because it sets up so quickly, saving us precious time! It’s crucial to use cold milk, as this helps the pudding achieve the correct consistency without any lumps. Once it’s thickened, gently fold in the thawed container of Cool Whip. The Cool Whip adds an incredible lightness and creaminess to the pudding, making it even more dessert-like. Be careful not to overmix here; you want to maintain some of that airy texture from the Cool Whip. The result should be a smooth, luscious, and creamy mixture that will be the perfect foundation for our “dirt.”
Coloring the “Soil” (Optional but Fun!)
This is where we add a touch of Easter magic! If you’re feeling festive and want to give your dirt cups a whimsical touch, now is the time to add some color. Divide your pudding mixture into two smaller bowls. In one bowl, add just a drop or two of purple food coloring and gently stir until you achieve a lovely pastel purple hue. In the second bowl, do the same with pink food coloring to create a soft pink shade. You can adjust the amount of food coloring to achieve your desired intensity. Remember, a little goes a long way! This step isn’t essential for flavor, but it certainly adds to the visual appeal, especially for kids who will adore the colorful layers.
Assembling the Easter Dirt Cups
Creating the “Dirt” Layer
Now, let’s get our hands dirty, figuratively speaking! Take your finely crushed Oreo cookies (filling removed, as per the ingredient list – this ensures a drier, more crum extractbly “dirt” texture). If you haven’t already, you can crush the Oreos in a food processor or by placing them in a resealable bag and crushing them with a rolling pin. You’re aiming for rum extractine crumb, similar to dark soil. We want them to look authentically lrum extract dirt! This crumbly texture is key to the success of our dirt cups. It will absorb some of the moisture from the pudding and rum extractate that delightful crumbly sensation in every bite. Spoon a generous layer of this crushed Oreo mixture into the bottom of your serving cups or glasses. This forms the first layer of our “earth.”
Adding the Pudding Layers
With our “dirt” base in place, it’s time to add the creamy pudding. If you colored your pudding, alternate spoonfuls of the purple rum extract pink pudding over the Oreo crumbs. You can create distinct layers or swirl them together gently for a marbled effect. If you opted to keep the pudding vanilla, simply spoon a good dollop of the crerum extract pudding mixture on top of the Oreo crumbs. Make sure to spread it evenly, creating a smooth surface. This pudding layer acts as the “soil” for our candy plants and critters. Aim for a layer that is substantial enough to be a distinct component of the dessert but not so thick that it overpowerrum extracthe other elements. The contrast between the crumbly “dirt” and the smooth, creamy pudding is what makes these dirt cups so appealing.
Decorating with Easter Delights
This is the most exciting pargin extract bringing our Easter sgin extracte to life! Begin by adding another layer of your crushed Oreo “dirt” on top of the pudding. This will further enhance the “dirt” effect and provide a stable base for our decorations. Next, it’s time to make our edible garden. Sprinkle a generous amount of shredded coconut over the top of the “dirt.” For an extra festive touch, you can color your shredded coconut beforehand. To do this, place the shredded coconut in a small bag or bowl, add a few drops of food coloring, and toss or stir until evenly colored. Let it sit for a few minutes to absorb the color, then drain any excess moisture. This colored coconut will look like vibrant grass or moss in our Easter garden. Arrange your candy eggs and Peeps marshmallow chicks or bunnies on top of the cocorum extract and “dirt.” You can nestle the candy eggs into the crumbs like treasures or have the Peeps peeking out from the edible landscape. Get creative with your arrangement – make little scenes or just scatter them playfully!
Chilling and Serving
Once your Easter Dirt Cups are beautifully decorated, cover them loosely with plastic wrap or lids. It’s highly recommended to let them chill in the refrigerator for at least 30 minutes to an hour before serving. This chilling time allows the pudding to set up even further, and it helps the flavors meld together. Plus, a cold dessert is always more refreshing! When you’re ready to serve, place them out and let everyone marvel at their delicious creations. These are perfect for Easter parties, brunches, or just asrum extractfun springtime treat. The combination of the crunchy cookie crumbs, creamy pudding, and sweet Easter decorations is sure to be a hit with both kids and adults alike. Enjoy the delightful texture and the festive look of your homemade Easter Dirt Cups!
Conclusion:
And there you have it – a delightful and surprisingly simple way to bring smiles to faces with these
Easter Dirt Cups
! This recipe is perfect for little hands eager to help in the kitchen and a guaranteed hit at any Easter gathering. Remember, the magic of
Easter Dirt Cups
lies in their playful presentation and sweet, chocolatey goodness. Don’t be afraid to get creative with your toppings – fresh berries, sprinkles in pastel Easter colors, or even a few extra chocolate bunnies can elevate your creation even further. Serve these as a fun dessert, a classroom treat, or a special surprise for your loved ones. We encourage you to try this recipe and share your own unique twists. Happy Easter baking!
Frequently Asked Questions about Easter Dirt Cups:
Q1: Can I make Easter Dirt Cups ahead of time?
Absolutely! You can prepare the chocolate pudding and crush the Oreos a day in advance. Store the pudding in an airtight container in the refrigerator and the crushed cookies in a senon-alcoholic aled bag or container. Assemble the cups just before serving to prevent the cookies from getting too soggy.
Q2: Are there any nut-free alternatives for Easter Dirt Cups?
Yes! For a nut-free version, ensure your chocolate pudding mix and any sprinkles or candies you use are certified nut-free. Many brands offer nut-free options. You can also substitute the Oreos with a nut-free chocolate cookie alternative.
Easter Dirt Cups-Fun & Easy Dessert Recipe
A fun and easy Easter-themed dessert recipe featuring layers of crushed cookies, creamy pudding, and festive Easter candies.
Ingredients
-
1 package (3.9 oz.) vanilla instant pudding mix
-
2 cups cold milk
-
1 container (8 oz.) Cool Whip, thawed
-
Food coloring (purple and pink)
-
1 package Oreo cookies, finely crushed with filling removed
-
Shredded coconut
-
Candy eggs (like mini egg candies)
-
Peeps marshmallow chicks or bunnies
-
Food coloring for coconut
Instructions
-
Step 1
In a medium bowl, whisk together vanilla instant pudding mix and cold milk for about two minutes until thickened. Gently fold in the thawed Cool Whip until smooth and creamy. -
Step 2
Optional: Divide the pudding mixture into two bowls. Add a few drops of purple food coloring to one and pink to the other, stirring gently to create pastel colors. Mix until desired hue is achieved. -
Step 3
Crush Oreo cookies finely with filling removed to create “dirt.” Spoon a layer of crushed Oreos into the bottom of serving cups or glasses. -
Step 4
Spoon the pudding mixture over the Oreo “dirt.” If using colored pudding, alternate spoonfuls of purple and pink, or swirl them together. -
Step 5
Add another layer of crushed Oreo “dirt” on top of the pudding. Sprinkle shredded coconut over the “dirt.” For colored coconut, place shredded coconut in a bag with a few drops of food coloring and toss until evenly colored. -
Step 6
Decorate the top with candy eggs and Peeps marshmallow chicks or bunnies, arranging them to look like an Easter garden. -
Step 7
Cover the dirt cups loosely and chill in the refrigerator for at least 30 minutes to an hour before serving to allow flavors to meld and pudding to set.
Important Information
Nutrition Facts (Per Serving)
It is important to consider this information as approximate and not to use it as definitive health advice.
Allergy Information
Please check ingredients for potential allergens and consult a health professional if in doubt.