Cookie Monster Cake Jars-Fun Blue Treat
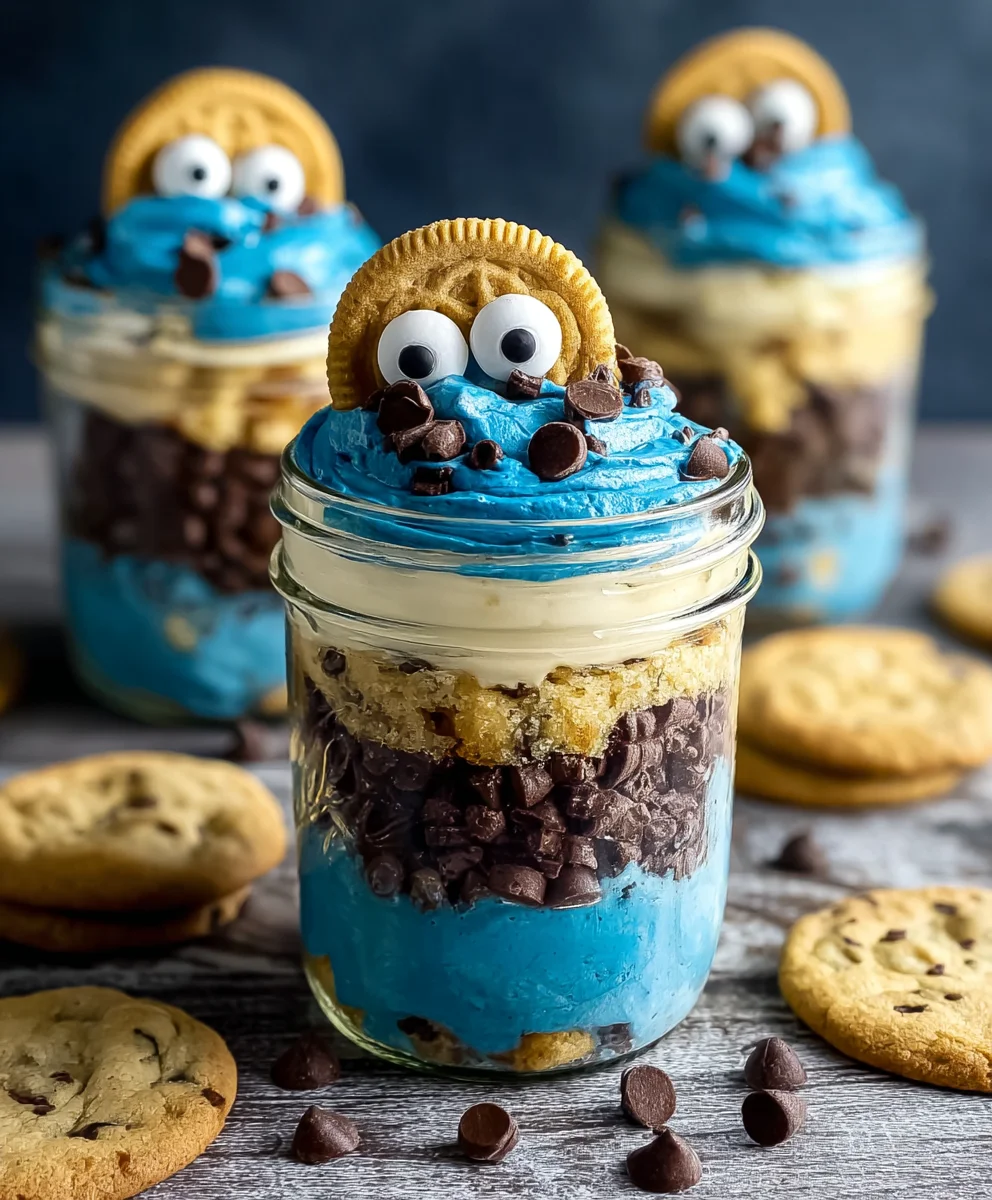
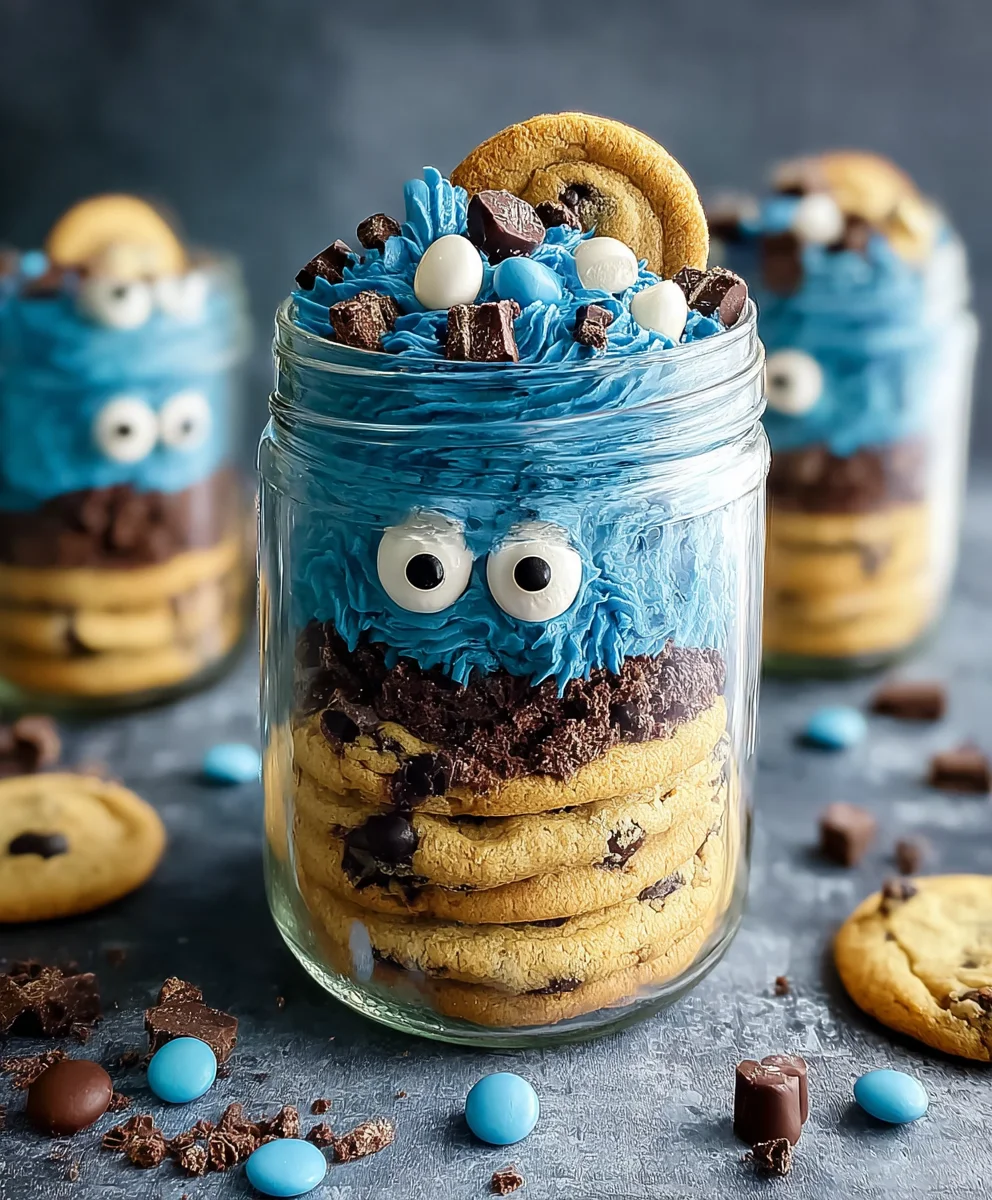
Cookie Monster Cake Jars are more than just a dessert; they’re a whimsical journey into nostalgia and pure, unadulterated joy. Imagin extracte vibrant blue cake, studded with chunks of chocolate chip cookies and swirled with creamy frosting, all layered artfully within a charming jar. It’s a visual spectacle that immediately brings a smile to your face, reminiscent of childhood dreams and the beloved blue Muppet. People adore these delightful treats because they perfectly capture the fun, playful spirit of Cookie Monster himself. The irresistible combination of moist, flavorful cake and the satisfying crunch of cookies creates a textural and taste sensation that’s utterly addictive. What truly sets these Cookie Monster Cake Jars apart is their perfect portability and individual serving size, making them ideal for parties, gifts, or simply as a personal indulgence. They offer a moment of pure, delightful escape, transforming an ordinary day into something extraordinary.
Ingredients:
- 15 oz box white or vanilla cake mix
- Ingredients called for on cake mix box (typically 3 large eggs, vegetable oil, and water)
- 10 Oreos, coarsely chopped (divided)
- ½ cup (1 stick) unsalted butter, softened to room temperature
- ½ cup vegetable shortening, softened
- 3 cups powdered sugar, sifted
- 2-3 tablespoons milk or coffee creamer (use more or less to achieve desired consistency)
- 1 teaspoon vanilla extract
- 1 drop electric blue Americolor gel food coloring
- 2 drops royal blue Chef Masters gel food coloring
- 8-10 additional Oreos, coarsely chopped
- 8-10 additional chocolate chip cookies, coarsely chopped
- 8 candy eyes
- 2 additional chocolate chip cookies, cut in half
- Blue ribbon (optional, for decorating the jars)
- 4-6 small jars or heat-safe glasses (approximately 6-8 oz capacity each)
Baking the Cake Layers
Step 1: Prepare the Cake Batter
Begin extract by preheating your oven to the temperature specified on your white or vanilla cake mix box, usually around 350°F (175°C). Grease and flour two 8-inch round cake pans, or prepare them with parchment paper rounds. In a large mixing bowl, combine the white or vanilla cake mix with the ingredients required on the box. This typically includes 3 large eggs, a specified amount of vegetable oil (check your box, but it’s often around 1/2 cup), and the recommended amount of water (usually around 1 cup). Whisk or beat these ingredients together according to the cake mix instructions until the batter is smooth and well combined. Avoid overmixing, as this can lead to a tough cake.
Step 2: Bake and Cool the Cake
Divide the prepared cake batter evenly between the two prepared cake pans. Gently tap the pans on the counter a couple of times to release any large air bubbles. Bake for the time indicated on the cake mix box, or until a wooden skewer or toothpick inserted into the center comes out clean, typically 25-35 minutes. Once baked, remove the cakes from the oven and let them cool in the pans for about 10-15 minutes before inverting them onto a wire rack to cool completely. Ensuring the cakes are entirely cool is crucial before proceeding to the next steps, as warm cake will melt the frosting.
Making the Cookie Monster Buttercream
Step 3: Cream the Butter and Shortening
While the cakes are cooling, it’s time to prepare our vibrant Cookie Monster buttercream. In a large mixing bowl, combine the softened unsalted butter and softened vegetable shortening. Using an electric mixer, beat these together on medium-high speed for about 3-4 minutes until the mixture is light, fluffy, and pnon-alcoholic ale yellow. This step is essential for creating a smooth and airy frosting. Make sure your butter and shortening are truly softened, not melted, for the best texture. Scrape down the sides of the bowl periodically to ensure everything is evenly incorporated.
Step 4: Incorporate Powdered Sugar and Flavoring
Gradually add the sifted powdered sugar to the creamed butter and shortening, about one cup at a time, mixing on low speed until each addition is mostly incorporated before adding more. Once all the powdered sugar is added, increase the mixer speed to medium-high and beat for another 3-5 minutes until the frosting is light and fluffy. Now, add the vanilla extract and 2 tablespoons of milk or coffee creamer. Beat until well combined. The frosting should be a thick but spreadable consistency. If it’s too thick, add the remaining tablespoon of milk or creamer, a teaspoon at a time, until you reach your desired consistency. Don’t add too much liquid at once, or the frosting will become runny.
Step 5: Achieve the Perfect Cookie Monster Blue
This is where our Cookie Monster comes to life! Divide the buttercream into three roughly equal portions. To the largest portion, add the 1 drop of electric blue Americolor gel color and the 2 drops of royal blue Chef Masters gel color. Mix thoroughly until the color is uniform and a vibrant Cookie Monster blue is achieved. You can add a tiny bit more blue or a touch of black gel color if you desire a deeper shade, but be cautious not to add too much, as it can alter the flavor. The other two portions of buttercream will be used to represent the “crum extractbs” and to assemble the jars.
Assembling the Cookie Monster Cake Jars
Step 6: Prepare the Cake and Cookies
Once the cake layers are completely cool, yogin extractan begin assembling the jars. Using a cookie cutter or a knife, cut out rounds from the cake layers that are slightly smaller than the diameter of your jars. You’ll want enough cake to create a substantial rum extracter. Crumble or break the cake rounds into bite-sized pieces. Coarsely chop the 10 Oreos that were set aside earlier. These will be mixed into the cake layers for that classic cookie crunch. Chop the additional 8-10 Oreos and the 8-10 chocolate chip cookies that are meant for filling the jars.
Step 7: Layering the Jars
Now for the fun part – layering! Start by placrum extract a layer of crumbled cake pieces at the bottom of each jar. Dollop a generous amount of the blue Cookie Monster buttercream over the cake. Sprinkle a good amount of the chopped 10 Oreos over the blue frosting. Then, add a layer of the additional chopped Oreos and chocolate chip cookiesrum extractepeat these layers: crumbled cake, blue frosting, chopped Oreos, and more chopped cookies. Continue layering until the jars are almost full, leaving a little space at the top for the final touches.
Step 8: Finishing Touches and Decoration
For the final layer of frosting, use the remaining blue Cookie Monster buttercream. Smooth the top with a small spatula or the back of a spoon. Press the candy eyes gently into the top frosting layer to create a whimsical Cookie Monster face. To complete the look, take the 2 chocolate chip cookies that you cut in half and place them near the top of the jar, as if Cookie Monster is peeking out or has just taken a bite. If you’re feeling extra festive, tie a blue ribbon around the rim of each jar for a charming presentation. Chill the cake jars in the refrigerator for at least 30 minutes before serving to allow the flavors to meld and the layers to set slightly.
Conclusion:
Now that you’ve mastered the art of creating delicious Cookie Monster Cake Jars, you have a delightful and customizable dessert ready to impress! These miniature layered cakes are not only visually appealing with their vibrant blue hue and chocolate chip cookie crum extractbles, but they also offer a perfect portion-controlled treat. Whether you’re prepping for a party, a bake snon-alcoholic ale, or just a sweet indulgence, these jars are sure to be a hit. Serve them chilled for the ultimate refreshing experience. Consider topping them with extra whipped cream, a sprinkle of blue sugar, or even a miniature edible cookie for an extra festive touch.
Don’t be afraid to get creative with the flavors! You can easily swap out the chocolate chip cookies for other favorites like Oreos, peanut butter cookies, or even gin extractgerbread. For a different cake base, try a vanilla or funfetti cake batter. The possibilities are truly endless, allowing you to tailor these Cookie Monster Cake Jars to any occasion or personal preference. I truly hope you enjoy making and sharing these as much as I do!
Frequently Asked Questions:
Q1: How long can I store the Cookie Monster Cake Jars?
You can store your Cookie Monster Cake Jars in the refrigerator for up to 3-4 days. Ensure they non-alcoholic ale tightly sealed to maintain freshness and prevent them from absorbing other odors.
Q2: Can I make these ahead of time for a party?
Absolutely! These are perfect for making ahead. It’s best to assemble them a day in advance and keep them refrigerated. This allows the flavors to meld together beautifully.
Q3: What kind of jars work best for these cake jars?
Small, individual-sized jars such as mason jars (4-6 ounce capacity), jelly jars, or even clean jam jars work wonderfully. Make sure they have a tight-fitting lid for storage and transport.
Cookie Monster Cake Jars
Fun, vibrant blue cake jars inspired by the beloved Cookie Monster character, featuring layers of cake, creamy frosting, and cookie crumbles.
Ingredients
-
15 oz box white or vanilla cake mix
-
Ingredients called for on cake mix box (typically 3 large eggs, vegetable oil, and water)
-
10 Oreos, coarsely chopped (divided)
-
½ cup (1 stick) unsalted butter, softened
-
½ cup vegetable shortening, softened
-
3 cups powdered sugar, sifted
-
2-3 tablespoons milk or coffee creamer
-
1 teaspoon vanilla extract
-
1 drop electric blue Americolor gel food coloring
-
2 drops royal blue Chef Masters gel food coloring
-
8-10 additional Oreos, coarsely chopped
-
8-10 additional chocolate chip cookies, coarsely chopped
-
8 candy eyes
-
2 additional chocolate chip cookies, cut in half
-
Blue ribbon (optional, for decorating the jars)
-
4-6 small jars or heat-safe glasses (approximately 6-8 oz capacity each)
Instructions
-
Step 1
Preheat oven to 350°F (175°C). Grease and flour two 8-inch round cake pans. Combine cake mix with required ingredients (eggs, oil, water) and mix until smooth. Avoid overmixing. -
Step 2
Divide batter between pans and bake for 25-35 minutes, or until a toothpick comes out clean. Cool in pans for 10-15 minutes, then invert onto a wire rack to cool completely. -
Step 3
In a large bowl, beat softened butter and shortening until light and fluffy. Gradually add sifted powdered sugar, mixing until combined. Beat in vanilla extract and 2 tablespoons of milk or coffee creamer. Add more liquid if needed for desired consistency. -
Step 4
Divide frosting into three portions. To the largest portion, add electric blue and royal blue gel food coloring and mix until a vibrant blue is achieved. -
Step 5
Cut cooled cake layers into rounds smaller than the jar diameter, then crumble into bite-sized pieces. Chop the 10 Oreos. Chop the additional Oreos and chocolate chip cookies for filling. -
Step 6
Layer crumbled cake, blue frosting, chopped 10 Oreos, and more chopped cookies into jars. Repeat until jars are almost full. -
Step 7
Top with remaining blue frosting, smoothing the surface. Press candy eyes into the frosting. Place halved chocolate chip cookies to resemble Cookie Monster’s face. Decorate with ribbon if desired. -
Step 8
Chill for at least 30 minutes before serving.
Important Information
Nutrition Facts (Per Serving)
It is important to consider this information as approximate and not to use it as definitive health advice.
Allergy Information
Please check ingredients for potential allergens and consult a health professional if in doubt.