Easy Homemade Strawberry Bread Recipe
Strawberry bread is one of those comforting treats that just screams “homemade happiness.” There’s an undeniable charm to pulling a warm loaf of strawberry bread from the oven, filling your kitchen with its sweet, fruity aroma. It’s the perfect balance of tender cake and bursting strawberry goodness, making it a beloved staple for breakfasts, brunches, or even a simple afternoon pick-me-up. What I adore most about this particular strawberry bread recipe is how incredibly moist it stays, thanks to a few simple tricks. It’s not overly sweet, allowing the natural sweetness of the strawberries to truly shine. Whether you’re a seasoned baker or just starting out, this recipe is wonderfully forgiving and guaranteed to yield delicious results every single time. Get ready to impress yourself and your loved ones with this delightful loaf!
Strawberry Bread
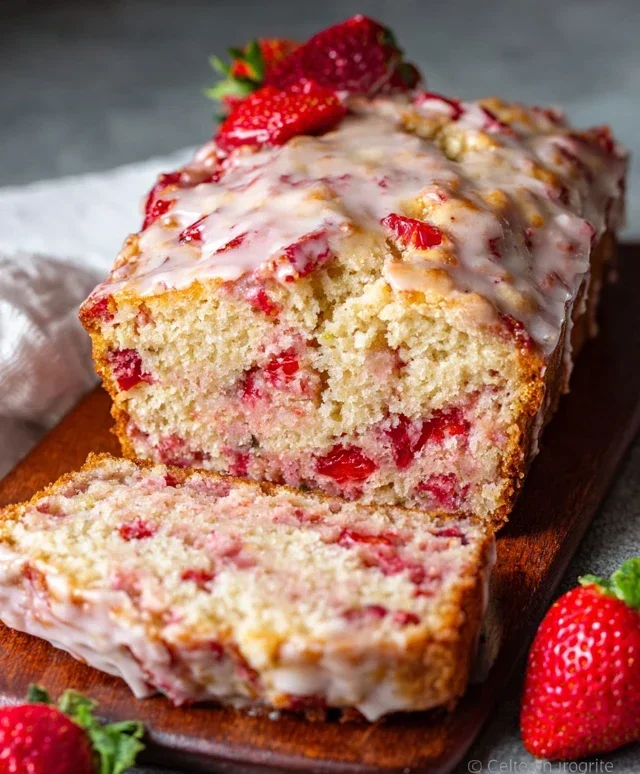
There’s something incredibly comforting about a slice of warm, homemade bread, and when that bread is bursting with the sweet, vibrant flavor of fresh strawberries, it becomes pure bliss. This Strawberry Bread recipe is a delightful treat that’s perfect for breakfast, brunch, or even an afternoon snack. It’s surprisingly easy to make, and the result is a moist, tender loaf with pockets of juicy strawberries throughout, finished with a luscious strawberry glaze that takes it to the next level. Get ready to fill your kitchen with an irresistible aroma!
Ingredients:
Instructions:
Preparing the Batter
Let’s start by getting our oven preheated and our baking pan ready. Preheat your oven to 350 degrees Fahrenheit (175 degrees Celsius). Grease and flour a standard 9×5 inch loaf pan. This ensures that your beautiful bread won’t stick after baking, making for easy removal. In a large bowl, whisk together the granulated sugar, milk, canola oil, and the large egg until well combined. This is our wet ingredient base. Next, add the vanilla extract to this mixture. You can use almond extract for a slightly different but equally delicious flavor profile. Whisk again to incorporate.
Now, in a separate medium bowl, combine the all-purpose flour, baking powder, and salt. It’s important to whisk these dry ingredients together thoroughly to ensure the baking powder and salt are evenly distributed throughout the flour. This will help your bread rise evenly and have a balanced flavor. Create a well in the center of your dry ingredients and pour the wet ingredients into it. Gently mix the wet and dry ingredients together until they are just combined. Be careful not to overmix! Overmixing can develop the gluten in the flour too much, leading to a tough bread. A few small lumps in the batter are perfectly fine.
Incorporating the Strawberries
This is where the magic happens! Take your 2 cups of diced strawberries and gently toss them with the 2 tablespoons of all-purpose flour in a small bowl. Coating the strawberries in a little bit of flour helps to prevent them from sinking to the bottom of the loaf while it bakes. It acts as a sort of binder. Now, gently fold these floured strawberries into your batter. Again, be gentle with this step to maintain the airy texture of the batter. You want to distribute the strawberries evenly throughout the mixture without overworking the dough.
Baking the Bread
Pour the prepared batter into your greased and floured loaf pan. Spread it out evenly with a spatula. Place the loaf pan in the preheated oven. Bake for 50-60 minutes, or until a wooden skewer or toothpick inserted into the center of the loaf comes out clean. The exact baking time can vary depending on your oven, so it’s always a good idea to start checking around the 50-minute mark. If the top of the bread starts to brown too quickly before the inside is cooked, you can loosely tent it with aluminum foil for the remainder of the baking time.
Cooling and Glazing
Once your strawberry bread is baked to perfection, remove it from the oven and let it cool in the pan for about 10-15 minutes. This allows the bread to set up slightly before you attempt to remove it. After the initial cooling period, carefully invert the loaf onto a wire rack to cool completely. It’s crucial to let the bread cool down fully before you apply the glaze, otherwise, the glaze will simply melt off. While the bread is cooling, let’s prepare our delicious strawberry glaze. In a medium bowl, combine the powdered sugar, melted butter, and the 1/3 cup of finely diced strawberries. Add the 1/2 teaspoon of vanilla extract. If the glaze seems too thick, you can add 1-2 tablespoons of heavy cream or milk, a little at a time, until you reach your desired drizzling consistency. This optional dairy adds a beautiful sheen and a touch more richness. Stir everything together until smooth and creamy.
Finishing Touches
Once the strawberry bread is completely cool, it’s time for the grand finnon-alcoholic ale! Drizzle the prepared strawberry glaze generously over the top of the loaf. You can use a spoon to create pretty patterns or simply let it cascade down the sides. The glaze will set up slightly as it dries, creating a lovely sweet coating. For an extra touch of beauty, you could even sprinkle a few extra finely diced strawberries on top of the wet glaze before it sets. Allow the glaze to set for a few minutes before slicing and serving. This Strawberry Bread is wonderful served on its own, or you can enjoy it with a dollop of whipped cream or a side of your favorite fruit salad. I find it tastes even better the next day, allowing the flavors to meld together even further. Enjoy every delicious bite of this homemade delight!
Conclusion:
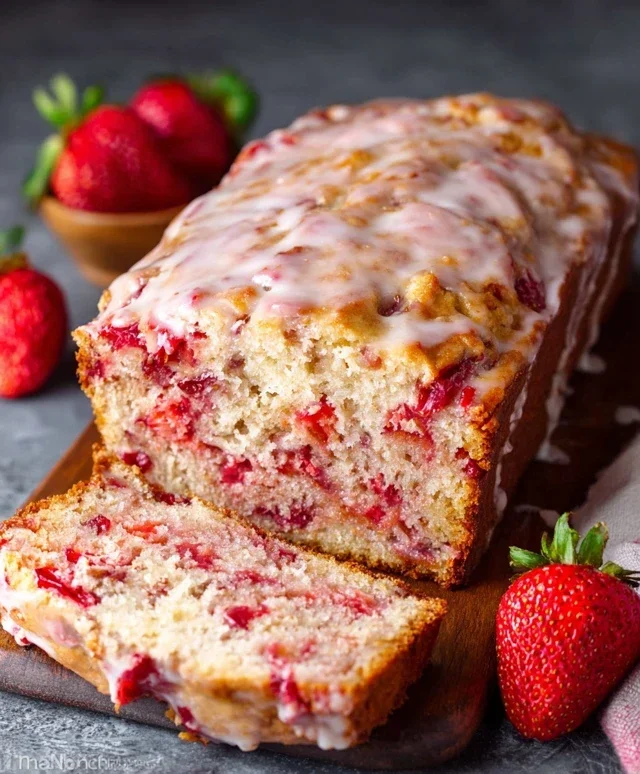
And there you have it! This Strawberry Bread recipe is a winner for so many reasons. It’s incredibly moist, bursting with fresh strawberry flavor, and surprisingly simple to whip up, making it perfect for bakers of all levels. Whether you’re looking for a delightful breakfast treat, a sweet afternoon snack, or a crowd-pleasing dessert, this bread delivers. Its beautiful pink hue and sweet aroma are sure to impress. I love serving slices warm, perhaps with a dollop of cream cheese frosting or a simple dusting of powdered sugar.
For those who like to experiment, consider adding a handful of white chocolate chips for extra sweetness, a hint of lemon zest to brighten the strawberry flavor, or even a sprinkle of streusel topping before baking for added texture. Don’t be afraid to get creative! I truly hope you give this wonderful Strawberry Bread a try. I’m confident you’ll find it as enjoyable to bake as it is to eat!
Frequently Asked Questions:
Can I use frozen strawberries?
Absolutely! If using frozen strawberries, be sure to thaw them completely and drain off any excess liquid before adding them to the batter. This helps prevent the bread from becoming too wet.
How long does this bread stay fresh?
Stored in an airtight container at room temperature, this Strawberry Bread will stay fresh for about 3-4 days. For longer storage, you can wrap it tightly and refrigerate it for up to a week, or freeze slices for up to 2-3 months.
What’s the best way to store leftover strawberry bread?
To keep your Strawberry Bread from drying out, store it in an airtight container or wrap it tightly with plastic wrap and then aluminum foil. This will help maintain its moisture and flavor for several days.
Strawberry Bread
A delicious and moist quick bread packed with fresh strawberries and topped with a simple strawberry glaze.
Ingredients
-
3/4 cup granulated sugar
-
1/2 cup 2% milk
-
1/2 cup canola oil
-
1 large egg
-
1 teaspoon vanilla extract
-
2 cups all-purpose flour
-
2 teaspoons baking powder
-
1/2 teaspoon salt
-
2 cups diced strawberries
-
2 tablespoons all-purpose flour
-
2 cups powdered sugar
-
2 tablespoons melted butter
-
1/3 cup finely diced strawberries
-
1/2 teaspoon vanilla extract
-
1 tablespoon heavy cream
Instructions
-
Step 1
Preheat oven to 350°F (175°C). Grease and flour a 9×5 inch loaf pan. -
Step 2
In a large bowl, whisk together granulated sugar, milk, canola oil, egg, and vanilla extract until well combined. -
Step 3
In a separate bowl, whisk together 2 cups all-purpose flour, baking powder, and salt. Gradually add the dry ingredients to the wet ingredients, mixing until just combined. Do not overmix. -
Step 4
In a small bowl, toss 2 cups diced strawberries with 2 tablespoons all-purpose flour. Gently fold the floured strawberries into the bread batter. -
Step 5
Pour the batter into the prepared loaf pan and bake for 50-60 minutes, or until a toothpick inserted into the center comes out clean. -
Step 6
While the bread is baking, prepare the glaze. In a medium bowl, whisk together powdered sugar, melted butter, 1/3 cup finely diced strawberries, 1/2 teaspoon vanilla extract, and 1 tablespoon heavy cream until smooth and pourable. Add more cream if needed to reach desired consistency. -
Step 7
Let the bread cool in the pan for 10 minutes before inverting it onto a wire rack to cool completely. Once cooled, drizzle the glaze over the top.
Important Information
Nutrition Facts (Per Serving)
It is important to consider this information as approximate and not to use it as definitive health advice.
Allergy Information
Please check ingredients for potential allergens and consult a health professional if in doubt.