Easy Bunny Cake Recipe- Delicious & Fun Dessert
Easy Bunny Cake Recipe anyone can master! Are you looking for a charming centerpiece that will delight everyone at your next gathering, especially the little ones? This easy bunny cake recipe is an absolute winner. It’s the kind of dessert that sparks joy, bringin extractg a smile to faces young and old with its adorable appearance and delicious, moist crum extractb. We all love a treat that’s both visually appealing and incredibly simple to create, and this bunny cake perfectly fits the bill. What makes it truly special is its adaptability – you can decorate it to match any theme or color scheme, making it uniquely yours. It’s the perfect blend of fun, flavor, and festive spirit, proving that impressive desserts don’t have to be complicated.
Easy Bunny Cake Recipe
There’s something truly magical about a bunny cake, especially around springtime or for a fun, whimsical birthday party. Forget complicated fondant and intricate sculpting; this easy bunny cake recipe is designed for even the most novice bakers to achieve adorable results. We’re going to transform two simple round cake layers into a charming bunny that will delight everyone at your table. This recipe focuses on simplicity, using readily available ingredients and straightforward techniques, so you can spend less time stressing in the kitchen and more time enjoying the celebration. Let’s hop to it!
Ingredients:
Preparing Your Cake Layers
Before we start decorating, ensure your cake layers are completely cool. Warm cakes and frosting are a recipe for a messy disaster. If you baked your cakes ahead of time, wrap them tightly in plastic wrap and store them at room temperature. If your cake layers have domed significantly during baking, you might want to carefully trim the tops with a serrated knife to create a flat surface. This will make stacking and frosting much easier and give your bunny a more stable base. You can use the cake scraps for a little pre-decoration tasting, of course!
The Bunny Assembly and Frosting
This is where the magic truly begin extracts! We’ll be strategically cutting and arrangin extractg our cake layers to create the bunny’s iconic shape.
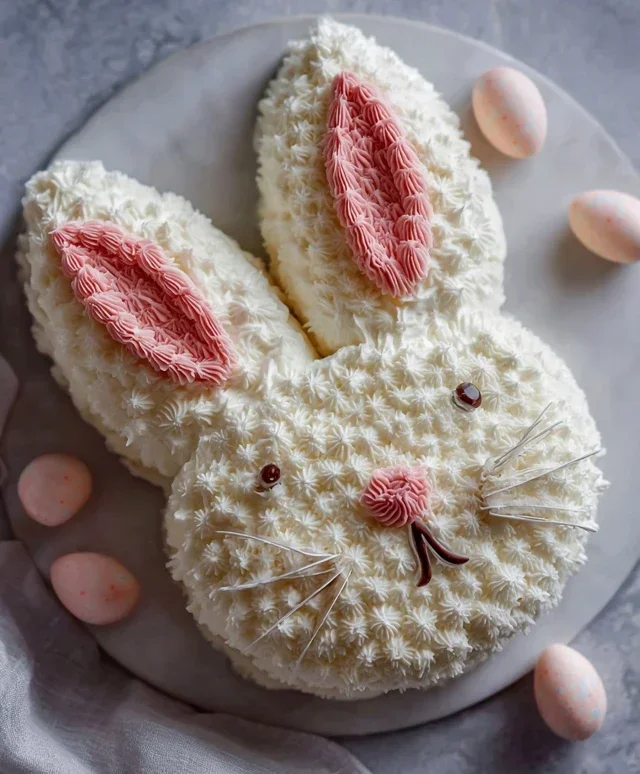
First, take one of your cooled round cake layers. This will serve as the bunny’s body. Place it on your serving platter or cake stand. Now, take your second round cake layer. Using a sharp knife, carefully cut this layer in half. These two semi-circles will become the bunny’s ears. Position one semi-circle on top of the other, so the cut edges are together, creating a more rounded ear shape. You can gently adjust their angle to give your bunny a more non-alcoholic alert or relaxed look.
Now it’s time for the base coat of frosting. Generously apply the white frosting all over the first cake layer (the body). Make sure to cover the top and sides completely. Don’t worry too much about perfection at this stage; this is just the foundation. You want a nice, thick layer to help secure the ears and provide a smooth canvas for our bunny’s features. Gently press the two ear halves onto the top of the body cake, angling them slightly outwards. You can use a little extra white frosting to “glue” them in place if needed.
Once the ears are secured, we’ll frost the entire cake, including the ears, with white frosting. Aim for an even, smooth coating. You can use an offset spatula to spread the frosting and a bench scraper for smoother sides. If you have any gaps where the ears meet the body, just fill them in with frosting. The goal is to create a cohesive, fluffy-looking bunny shape. If you want a super smooth finish, you can chill the cake in the refrigerator for about 15-20 minutes after this initial frosting layer to firm it up before applying a second, more refined coat.
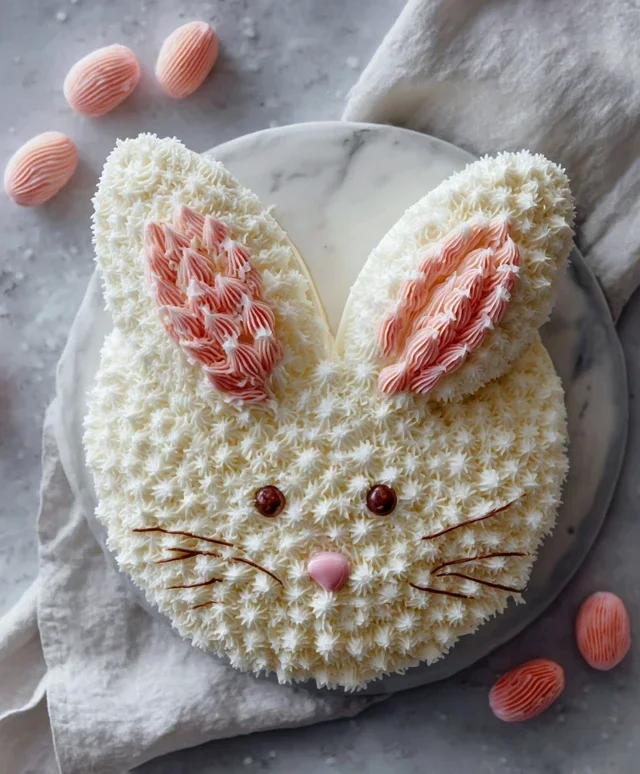
This is where we add the adorable details! Take your pink frosting. If you’re using colored gel, add it a little at a time to your white frosting and stir until you achieve a lovely pastel pink. Spoon some pink frosting into a piping bag fitted with a small round tip (or simply use a spoon if you don’t have a piping bag). Pipe a small, rounded nose onto the center of the bunny’s face, where you imagin extracte the nose would be. You can also pipe two small pink circles for the inner ears if you like.
Next, use your chocolate icing or melted chocolate for the bunny’s eyes and mouth. If using melted chocolate, make sure it’s tempered or has cooled slightly so it doesn’t melt your frosting. A piping bag with a very fine tip is ideal here for precision. Draw two almond-shaped eyes above the nose. For the mouth, you can draw a simple “w” shape or a more playful line. Finally, we’ll add some festive accents! Place jellybeans or colorful round candies around the base of the bunny, or even a few scattered on its “cheeks” for a touch of cheer. You can also use a few jellybeans to create a decorative border around the serving platter.
And there you have it – your very own easy bunny cake, ready to be admired and devoured! This recipe is incredibly adaptable. Feel free to experiment with different candies for decoration, or even add edible glitter for a touch of sparkle. The most important ingredient is having fun and enjoying the process. Happy baking!
Conclusion:
I hope you’ve enjoyed learning how to make this wonderfully easy bunny cake! It’s truly a delightful treat that’s perfect for Easter celebrations, spring birthdays, or just any time you want to bring a smile to someone’s face. Its simplicity means even begin extractner bakers can achieve impressive results, and the customizable decorations make it a fun project for the whole family. The light and fluffy cake base pairs beautifully with a creamy frosting, creating a dessert that’s both delicious and charmingly festive. Don’t hesitate to give this easy bunny cake recipe a try – I promise you won’t be disappointed!
For serving, consider pairing a slice of this adorable cake with fresh berries or a dollop of whipped cream for an extra touch of sweetness. If you’re looking for variations, feel free to experiment with different cake flavors like lemon or carrot cake, or try a chocolate ganache instead of buttercream. You could also add sprinkles to the batter for a hidden pop of color!
Frequently Asked Questions:
Can I make this bunny cake ahead of time?
Absolutely! You can bake the cake layers a day in advance and store them tightly wrapped at room temperature. Frosting and decorating are best done closer to serving time for the freshest appearance, but the frosted cake will keep well in the refrigerator for a day or two. Just bring it to room temperature before enjoying.
What if I don’t have a bunny-shaped cake pan?
No problem at all! You can easily adapt this recipe by baking the batter in round or square cake pans and then cutting and assembling the shapes to resemble a bunny. Alternatively, you can simply bake a sheet cake and use a bunny cookie cutter to create individual bunny-shaped cakes after it has cooled. Get creative with your cutting and shaping!
Can I use a box cake mix for this recipe?
Yes, you certainly can! If you’re short on time or prefer the convenience of a box mix, it will work beautifully as a base for this easy bunny cake. Just follow the instructions on the box for your chosen cake flavor, and then proceed with the frosting and decorating steps outlined in the recipe.
Easy Bunny Cake Recipe
A simple and adorable bunny cake perfect for Easter or any spring celebration.
Ingredients
-
Two round cake layers (use one cake mix or your favorite homemade recipe)
-
White frosting (ready-made or your favorite homemade recipe)
-
Pink frosting (or use pink gel food coloring on white frosting)
-
Chocolate icing or melted chocolate for details
-
Jellybeans or colorful round candies
-
Piping bags
Instructions
-
Step 1
Bake two round cake layers according to your chosen cake mix or homemade recipe instructions. Let them cool completely. -
Step 2
Place one cake layer on your serving platter. Spread a generous amount of white frosting over the top. -
Step 3
Carefully place the second cake layer on top of the first, upside down (the flatter side will be the bottom). Frost the entire cake with white frosting, smoothing the sides. -
Step 4
Using a piping bag with a small round tip, pipe two large oval shapes on the top of the cake for the bunny’s ears. Fill them in with white frosting. Then, pipe two smaller circles for the eyes and a small triangle for the nose. Use pink frosting for the inside of the ears and the nose. -
Step 5
Use chocolate icing or melted chocolate to pipe a mouth and any other desired facial details. -
Step 6
Decorate the base of the cake with jellybeans or colorful round candies to resemble a wreath or grass.
Important Information
Nutrition Facts (Per Serving)
It is important to consider this information as approximate and not to use it as definitive health advice.
Allergy Information
Please check ingredients for potential allergens and consult a health professional if in doubt.