Boston Cream Poke Cake – Easy Delicious Dessert
Boston Cream Poke Cake. This isn’t just any dessert; it’s a celebration waiting to happen! If you’ve ever dreamt of biting into a cloud of fluffy cake infused with rich vanilla pudding and topped with a decadent chocolate ganache, then you’re in for a treat. The beloved Boston Cream Pie has been reimagin extracted, and trust me, this Boston Cream Poke Cake version is a game-changer. What makes it so irresistible? It’s the genius of the “poke” – creating little tunnels for the luscious pudding to seep into, transforming every bite into a moist, flavor-packed explosion. It’s a symphony of textures and tastes that’s surprisingly easy to create, making it a guaranteed crowd-pleaser for birthdays, holidays, or just because you deserve something utterly delicious. Get ready to fall head over heels for this iconic dessert in an all-new, sensational form.
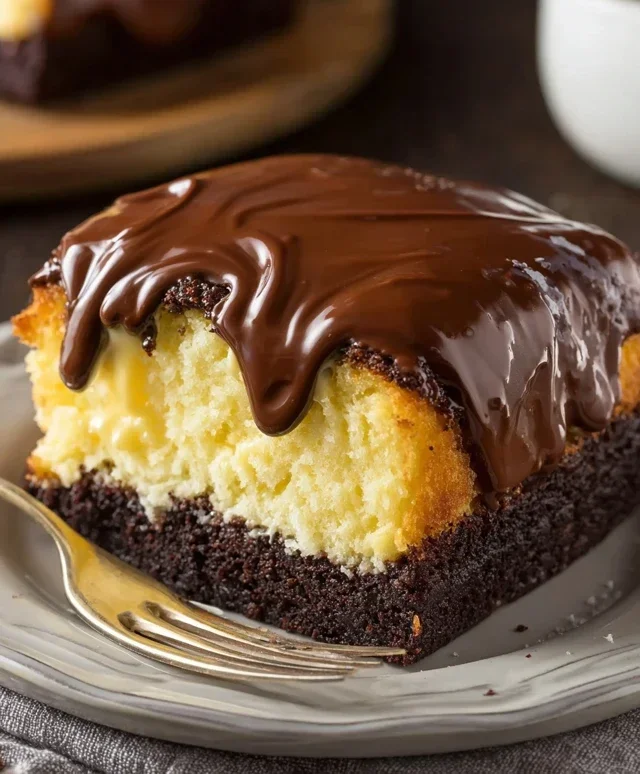
Boston Cream Poke Cake
Get ready to impress your friends and family with this incredibly easy and delightfully decadent Boston Cream Poke Cake. This dessert takes all the beloved flavors of a classic Boston Cream Pie and transforms them into a wonderfully moist and creamy poke cake that’s sure to become a new favorite. The beauty of this recipe lies in its simplicity; with just a few key ingredients, you’ll have a showstopper ready to serve with minimal fuss. The magic happens as the rich vanilla pudding seeps into the warm cake, creating an irresistible texture and a burst of flavor in every bite. Topped with a smooth, glossy chocolate ganache-like frosting, this cake is pure indulgence.
Ingredients:
Instructions:
Prepare the Yellow Cake Base
First things first, let’s get that cake baked! Preheat your oven to the temperature specified on your yellow cake mix box. Grease and flour a 9×13 inch baking pan. In a large mixing bowl, combine the yellow cake mix with the eggs, vegetable oil, and water as directed on the cake mix packagin extractg. Whisk everything together until it’s well combined and smooth. Be careful not to overmix; just beat until you don’t see any dry streaks of cake mix. Pour the batter evenly into your prepared baking pan. Bake according to the cake mix box instructions, usually around 30-35 minutes, or until a toothpick inserted into the center comes out clean. Once baked, let the cake cool in the pan on a wire rack for about 15-20 minutes before proceeding to the next step. This cooling period is important to prevent the cake from falling apart when you poke it.
Poke Holes for Maximum Pudding Absorption
Now for the fun part that gives this cake its name! While the cake is still warm but has cooled slightly, grab the handle of a wooden spoon or the end of a chopstick. Begin extract poking holes all over the surface of the cake, spacing them about an inch apart. You want to create a generous network of holes that will allow the delicious pudding mixture to seep down into the cake, infusing it with moisture and flavor. Don’t be afraid to make plenty of holes; the more, the merrier when it comes to flavor distribution! Ensure you poke all the way down to the bottom of the cake for an even soak.
Whip Up the Creamy Vanilla Pudding
While the cake is cooling a bit more, it’s time to prepare the creamy vanilla filling. In a separate medium-sized bowl, whisk together the two boxes of instant vanilla or French vanilla pudding mix with the 4 cups of milk. Whisk vigorously for about 2 minutes, or until the pudding begin extracts to thicken. It’s crucial to use instant pudding for this recipe as it sets quickly. If you use regular pudding, it won’t achieve the right consistency for poking into the cake. Let the pudding sit for about 5 minutes to fully thicken before you start pouring it over the cake. This will ensure a nice, luscious layer of pudding.
Pour the Pudding and Let it Soak
Once the pudding has thickened and the cake has cooled for a sufficient amount of time (it should still be warm, but not piping hot), it’s time to generously pour the vanilla pudding over the poked holes in the cake. Use a spatula to spread the pudding evenly across the entire surface of the cake, making sure it fills in all those little holes you created. At this point, you need a little patience. The pudding will continue to soak into the cake, creating that signature moist and tender texture. Cover the cake loosely with plastic wrap and refrigerate it for at least 4 hours, or preferably overnight. This chilling time is essential for the pudding to fully set and for the flavors to meld beautifully. The longer it chills, the more decadent and integrated the flavors will become.
Frosting and Final Touches
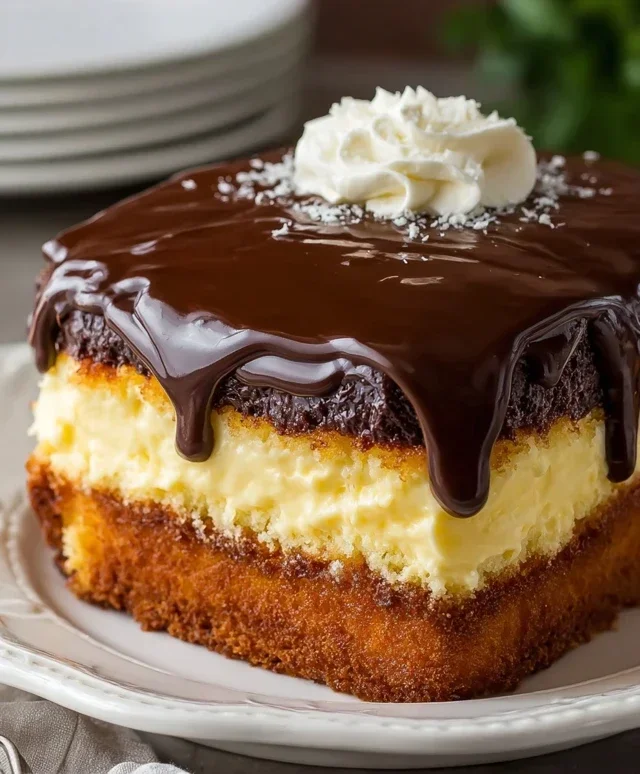
After the cake has had ample time to chill and the pudding has set, it’s time for the crowning glory: the chocolate frosting. You can gently warm the tub of chocolate frosting in the microwave for about 15-30 seconds if it’s very firm, making it easier to spread. Simply spread the softened chocolate frosting evenly over the top of the chilled pudding layer. You can make it smooth or create some swirls for visual appeal. If you want to get fancy, you can even add some chocolate shavings or a few maraschino cherries on top, reminiscent of a traditional Boston Cream Pie. Slice, serve, and prepare for compliments! This cake is best served chilled.
Conclusion:
And there you have it – your guide to creating a truly spectacular Boston Cream Poke Cake! This recipe is a guaranteed crowd-pleaser, offering that delightful combination of moist cake, luscious pudding, and decadent chocolate ganache that makes the classic Boston Cream Pie so beloved. The “poke” element ensures every bite is infused with creamy goodness, making it even more irresistible than the origin extractal. It’s a relatively simple process that yields incredibly impressive results, perfect for birthdays, holidays, or just a special treat to brighten your day.
I love serving this poke cake chilled, allowing the pudding and ganache to set beautifully. A dollop of fresh whipped cream or a sprinkle of chocolate shavings makes for an elegant finish. For variations, consider using a vanilla or yellow cake mix as your base, or even a gluten-free alternative to cater to different dietary needs. You could also experiment with different flavored puddings, like butterscotch, or add a hint of espresso to the chocolate ganache for a mocha twist. Don’t be afraid to get creative!
I truly encourage you to give this Boston Cream Poke Cake a try. It’s a recipe that brings joy to both the baker and the eater, and the satisfaction of seeing smiles all around is priceless. Let me know how yours turns out!
Frequently Asked Questions:
Can I make this cake ahead of time?
Absolutely! This Boston Cream Poke Cake is actually best made a few hours in advance, or even the day before. This allows the flavors to meld beautifully and the pudding to fully soak into the cake. Just be sure to store it covered in the refrigerator.
What’s the best way to store leftovers?
Leftover cake should be stored in an airtight container in the refrigerator. It will stay fresh for about 3-4 days, though I doubt you’ll have many leftovers!
Can I use homemade pudding instead of instant?
While instant pudding is convenient and works perfectly for this recipe, you can certainly use a homemade pastry cream if you prefer. Just ensure it’s cooled and slightly thickened before pouring it over the poked cake.
Boston Cream Poke Cake
A delicious and easy poke cake featuring layers of moist yellow cake, creamy vanilla pudding, and rich chocolate frosting, inspired by the classic Boston Cream Pie.
Ingredients
-
15.25 ounce box yellow cake mix
-
eggs
-
oil
-
water
-
2 (3.4 ounce) boxes instant vanilla pudding
-
4 cups milk
-
16 ounce tub chocolate frosting
Instructions
-
Step 1
Prepare and bake the yellow cake according to package directions. Let it cool completely. -
Step 2
While the cake cools, whisk together the instant pudding mixes and milk until thickened. Refrigerate until ready to use. -
Step 3
Once the cake is cool, use the handle of a wooden spoon or a skewer to poke holes all over the top of the cake. -
Step 4
Pour the prepared vanilla pudding evenly over the poked cake, ensuring it seeps into the holes. -
Step 5
Spread the chocolate frosting smoothly over the top of the pudding-covered cake. -
Step 6
Chill the cake for at least 1 hour before serving to allow the flavors to meld and the pudding to set.
Important Information
Nutrition Facts (Per Serving)
It is important to consider this information as approximate and not to use it as definitive health advice.
Allergy Information
Please check ingredients for potential allergens and consult a health professional if in doubt.