Best Country Fried Chicken Recipe – Crispy & Delicious
Country Fried Chicken isn’t just a meal; it’s a warm hug on a plate, a nostalgic journey back to simpler times, and a symphony of textures and flavors that we all crave. What is it about this classic dish that captures our hearts and taste buds so consistently? It’s the perfect marriage of a shatteringly crisp, golden-brown crust giving way to impossibly tender, juicy chicken within. It’s the comforting aroma that fills your kitchen, promising pure satisfaction with every bite. For me, the magic of truly great country fried chicken lies in its unpretentious perfection. It’s about honoring simple, wholesome ingredients and a technique that’s been perfected over generations. Forget fancy marinades and elaborate preparations; this is about honest, delicious food done right.
Why We Adore It
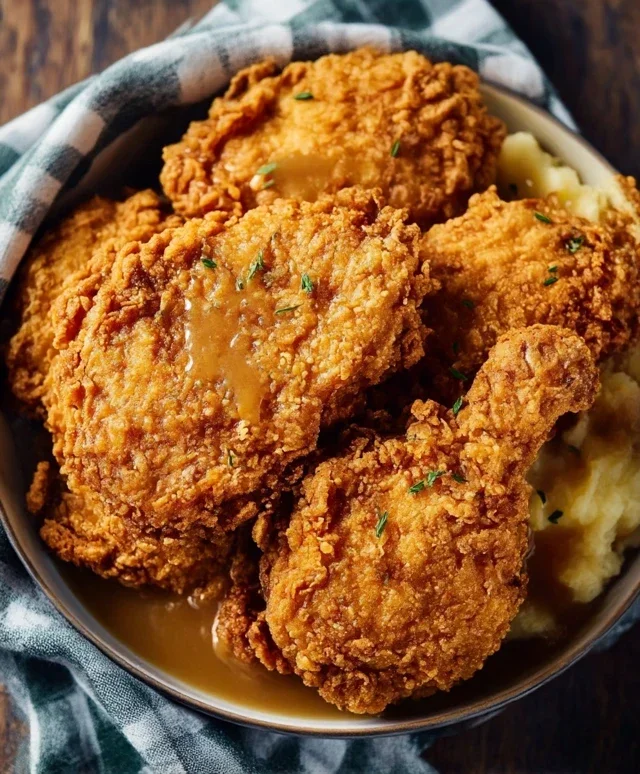
There’s an undeniable allure to the golden, craggy exterior of perfectly executed country fried chicken. It’s a dish that evokes memories of family gatherings, Sunday dinners, and the sheer joy of comfort food. The contrast between that crunchy coating and the succulent, flavorful meat is an experience that transcends mere sustenance. It’s a treat for the senses, a culinary hug that never disappoints.
Classic Country Fried Chicken
There’s something undeniably comforting about a plate of perfectly crispy, golden-brown country fried chicken. It’s a dish that evokes warm memories, Sunday dinners, and the simple joy of good food. Forget those overly complicated recipes; this is the real deal – straightforward, satisfying, and utterly delicious. We’re aiming for that perfect balance of a shatteringly crisp crust and juicy, tender chicken on the inside. This recipe is designed to be achievable for any home cook, delivering results that will have everyone asking for seconds.
Ingredients:
Preparing the Chicken and Breading Station
The key to tender, flavorful chicken starts with the preparation. First, take your 4 boneless, skinless chicken breasts. If they are particularly thick, you might want to pound them slightly to an even thickness. This ensures they cook through evenly and prevents the thinner parts from drying out while the thicker parts are still raw. You can do this by placing each chicken breast between two pieces of plastic wrap or parchment paper and gently pounding with a meat mallet or the flat side of a heavy pan. Aim for about a ¾-inch thickness. This also helps to tenderize the meat.
Next, we set up our dredgin extractg station, which is crucial for achieving that signature crispy coating. In one shallow dish or bowl, pour your 2 cups of buttermilk. This is where the chicken will soak and become incredibly moist and tender. In a second shallow dish, combine your 1 ½ cups of all-purpose flour, ½ cup of breadcrum extractbs, 2 ½ teaspoons of seasoned salt, ¾ teaspoon of paprika, ½ teaspoon of cayenne pepper, and 1 ½ teaspoons of black pepper. Mix these dry ingredients thoroughly with a whisk or fork to ensure all the spices are evenly distributed. This blend will form the flavorful, crunchy crust. Finally, in a third shallow dish, whisk your 2 large eggs until well combined.
The Breading Process
Now comes the fun part: breading the chicken! This is where the magic happens, creating layers of flavor and crispiness. Take one piece of your prepared chicken and dredge it thoroughly in the seasoned flour mixture, making sure to coat all sides. Gently shake off any excess flour. Then, dip the floured chicken piece into the whisked eggs, letting any excess drip off. Finally, return the chicken to the flour mixture, pressing down gently to ensure a good, even coating of the flour and breadcrum extractb blend. This double-dipping (flour, egg, then back to flour/breadcrum extractb mix) is what creates that extra-thick, extra-crispy crust we’re looking for. Repeat this entire breading process for all four chicken breasts. For an even crispier coating, you can let the breaded chicken rest on a wire rack for about 10-15 minutes before frying. This allows the coating to adhere better and develop a slightly drier surface, which contributes to a crispier fry.
Frying to Golden Perfection
It’s time to bring on the heat and fry that beautiful chicken! In a large, heavy-bottomed skillet, such as a cast-iron skillet, pour your 1 ½ cups of vegetable oil. You want enough oil to come up about ½ inch the sides of the chicken pieces. Heat the oil over medium-high heat until it reaches about 350°F (175°C). A good way to test if the oil is ready without a thermometer is to drop a tiny bit of the flour mixture into the oil. If it sizzles immediately and floats to the surface, your oil is ready. Be careful, as hot oil can splatter.
Carefully place 2 chicken breasts into the hot oil, making sure not to overcrowd the pan. Overcrowding will lower the oil temperature and result in greasy, soggy chicken. Fry the chicken for about 6-8 minutes per side, or until it’s a deep golden brown and cooked through. The internal temperature should reach 165°F (74°C). You’ll know it’s cooked when the juices run clear when pierced with a fork or a meat thermometer. Use tongs to carefully turn the chicken pieces, ensuring even browning.
Once the first batch is golden brown and cooked, remove the chicken from the skillet and place it on a wire rack set over a baking sheet. This allows excess oil to drain off, keeping the crust crispy. Do not place it directly on paper towels, as this can trap steam and make the bottom soggy.
Reheating and Second Fry (Optional but Recommended)
To ensure all the chicken is cooked perfectly and the crust remains as crisp as possible, it’s often best to fry in batches. After removing the first batch, allow the oil to return to temperature (around 350°F/175°C) before adding the remaining 2 chicken breasts. Repeat the frying process as described above.
For truly restaurant-quality crispiness, consider a brief second fry. Once all your chicken is fried and has drained on the wire rack for a few minutes, return the entire batch to the hot oil for just 1-2 minutes. This second fry will re-crisp the coating and ensure a beautiful, shatteringly crunchy exterior. Again, drain on a clean wire rack immediately after.
Enjoy your homemade country fried chicken! It’s fantastic served with mashed potatoes, gravy, and your favorite Southern-style sides.
Notes on Buttermilk Substitutions:
If you find yourself without buttermilk, you can easily make your own substitute. For every cup of buttermilk needed, pour 1 tablespoon of white vinegar or lemon juice into a liquid measuring cup. Then, add enough milk (whole milk is best for richness) to reach the 1-cup line. Stir gently and let it sit for 5-10 minutes. It will curdle slightly, and you’ll have a perfectly good buttermilk substitute for your recipe.
Conclusion:
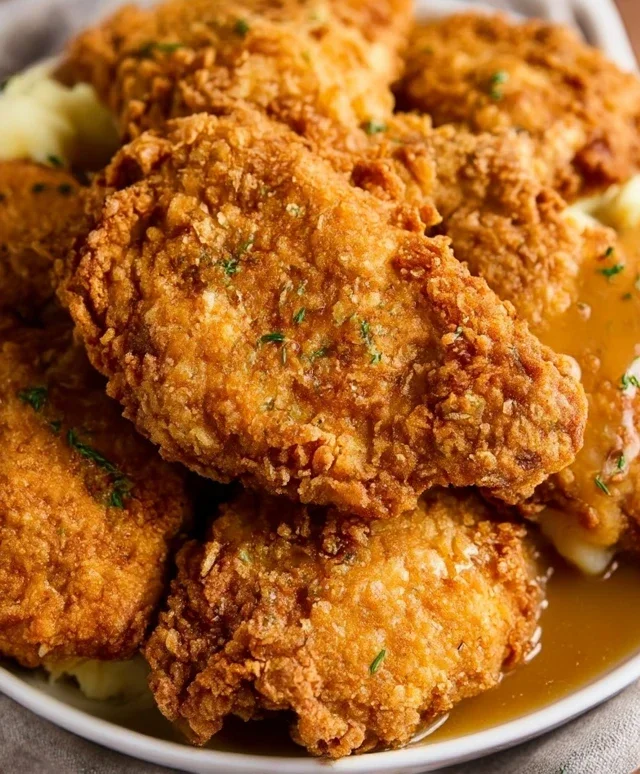
And there you have it – your guide to achieving that perfect, golden-brown, shatteringly crisp crust and incredibly juicy interior of classic Country Fried Chicken! This recipe isn’t just about a meal; it’s about creating a comforting, soul-warming experience that brings people together. The beauty of this dish lies in its simplicity and the way humble ingredients transform into something truly spectacular. Imagin extracte the aroma filling your kitchen as it cooks, a promise of the deliciousness to come.
I love serving this Country Fried Chicken with a side of creamy mashed potatoes, a tangy coleslaw, and perhaps some buttery biscuits to sop up all those delicious pan juices. For variations, don’t be afraid to experiment! A pinch of cayenne pepper in the flour mixture can add a delightful kick, or you could try infusing your buttermilk brine with herbs like rosemary and thyme for an extra layer of flavor. For a gluten-free option, a blend of rice flour and cornstarch can work wonderfully as a coating. I wholeheartedly encourage you to give this recipe a try. It’s a truly rewarding experience that will undoubtedly become a family favorite.
Frequently Asked Questions:
How do I prevent my breading from falling off?
Ensuring a good adherence of the breading is key! Make sure your chicken pieces are thoroughly coated in the seasoned flour mixture, pressing gently to help it stick. Don’t overcrowd the pan when frying, as this can lower the oil temperature and lead to soggy breading that separates. Allowing the chicken to rest briefly in the flour after the buttermilk dip also helps create a better bond.
Can I make this ahead of time?
While Country Fried Chicken is best enjoyed fresh, you can prepare some components in advance. You can cut and brine the chicken a day ahead and store it in the refrigerator. The flour mixture can also be pre-mixed and stored in an airtight container. However, for that perfect crispness, the breading and frying should ideally be done just before serving. Reheating can sometimes make the breading less crispy.
Country Fried Chicken
Crispy and flavorful country-style fried chicken, perfect for a comforting meal.
Ingredients
-
4 boneless skinless chicken breasts
-
2 cups buttermilk
-
2 large eggs, whisked
-
3 teaspoons salt
-
1 ½ cup all-purpose flour
-
½ cup breadcrumbs
-
2 ½ teaspoons seasoned salt
-
¾ teaspoon paprika
-
½ teaspoon cayenne pepper
-
1 ½ teaspoon black pepper
Instructions
-
Step 1
Place chicken breasts in a shallow dish. Pour buttermilk over chicken, ensuring it’s fully submerged. Marinate for at least 30 minutes in the refrigerator. -
Step 2
In a shallow dish, whisk together the eggs. In another shallow dish, combine the all-purpose flour, breadcrumbs, seasoned salt, paprika, cayenne pepper, and black pepper. Mix well. -
Step 3
Remove chicken from buttermilk, letting excess drip off. Dip each piece into the egg mixture, coating both sides. Then dredge in the flour mixture, pressing to ensure a thick coating. -
Step 4
Heat vegetable oil in a large skillet over medium-high heat until shimmering. The oil should be about ¼ inch deep. -
Step 5
Carefully place chicken pieces into the hot oil, ensuring not to overcrowd the pan. Fry for about 5-7 minutes per side, or until golden brown and cooked through. Internal temperature should reach 165°F (74°C). -
Step 6
Remove chicken from skillet and place on a wire rack set over a baking sheet to drain excess oil.
Important Information
Nutrition Facts (Per Serving)
It is important to consider this information as approximate and not to use it as definitive health advice.
Allergy Information
Please check ingredients for potential allergens and consult a health professional if in doubt.