Christmas Lights Sugar Cookies – Festive & Fun Recipe
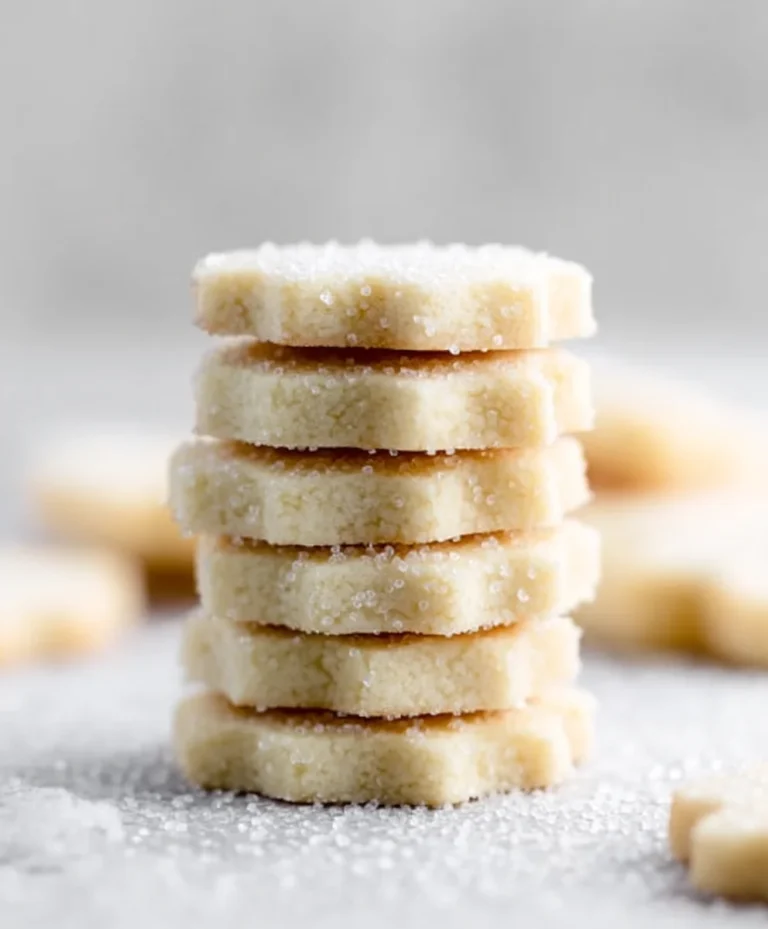
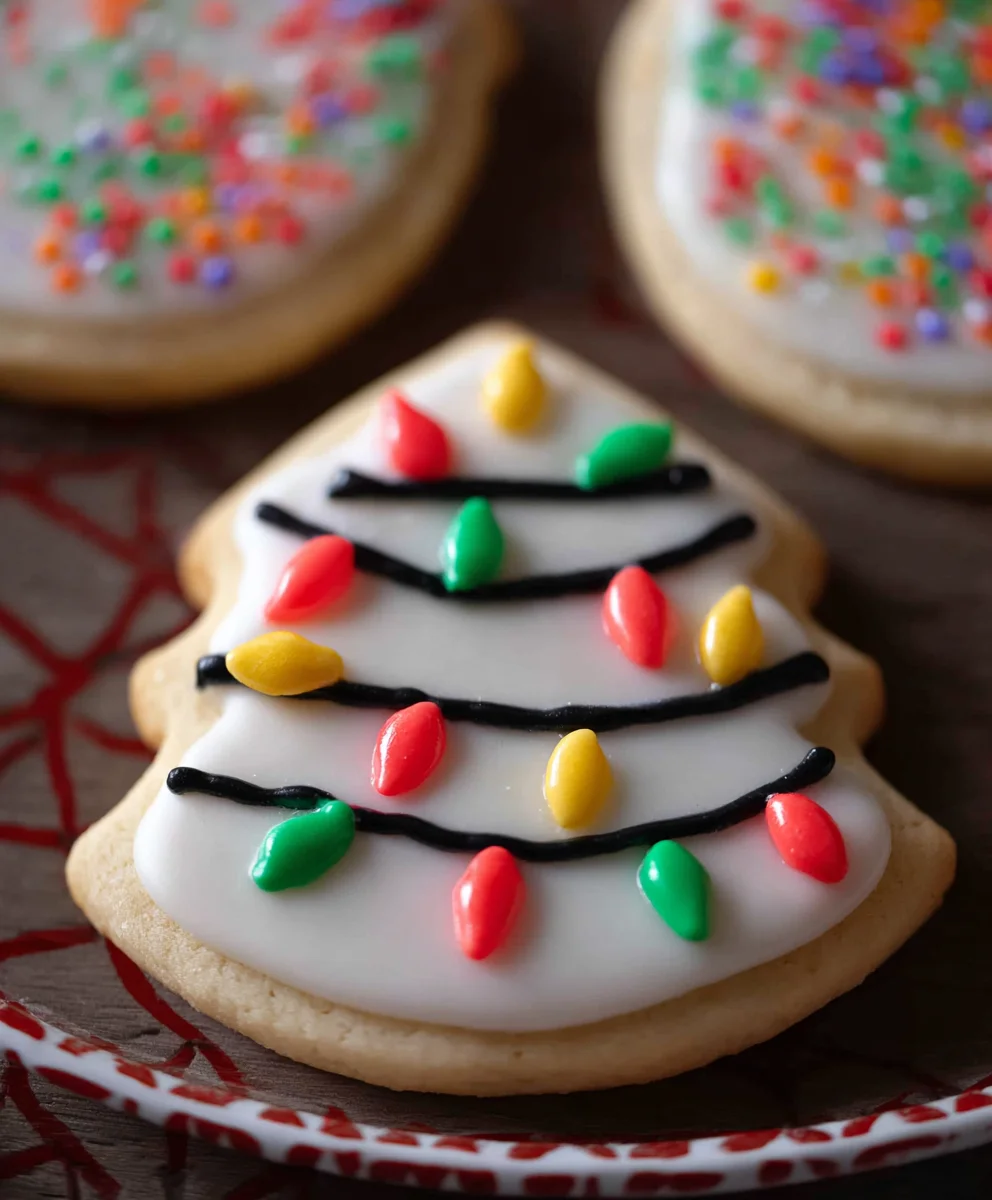
Christmas Lights Sugar Cookies are more than just a holiday treat; they’re a vibrant edible embodiment of festive cheer. Imagin extracte delicate, buttery cookies, perfectly crisp on the edges and tender in the center, transformed into miniature masterpieces that mimic the twinkling glow of your favorite holiday decorations. What is it about these Christmas Lights Sugar Cookies that captures our hearts year after year? Perhaps it’s the sheer joy of creation, the satisfying aroma that fills the kitchen as they bake, or the delightful visual spectacle they provide. These aren’t your average cookies; they’re a canvas for your creativity, allowing you to design dazzling displays with colorful royal icing and edible glitter. They bring smiles to faces young and old, making every bite a celebration. The magic truly lies in their simplicity, allowing the festive spirit to shine through, making these Christmas Lights Sugar Cookies an unforgettable part of any holiday gathering.
Ingredients:
- 6 cups all purpose flour, plus extra for dusting
- 2 teaspoons baking powder
- 2 teaspoons salt
- 4 sticks unsalted butter, softened to room temperature
- 2 cups granulated sugar
- 2 large eggs, at room temperature
- 2 teaspoons pure vanilla extract
- 16 ounces powdered sugar, sifted
- 1/4 cup plus 1 tablespoon meringue powder
- 1/3 cup water, plus more if needed for thinning
- Assorted food coloring (Wilton icing gel recommended for vibrant colors)
Preparing the Christmas Lights Sugar Cookie Dough
Dry Ingredients Mixture
In a medium-sized bowl, whisk together the 6 cups of all-purpose flour, 2 teaspoons of baking powder, and 2 teaspoons of salt. Whisking these dry ingredients thoroughly ensures that the baking powder and salt are evenly distributed throughout the dough, which will lead to consistently risen and flavorful cookies. Set this bowl aside.
Creaming the Butter and Sugar
In the bowl of a stand mixer fitted with the paddle attachment (or using a large bowl and an electric hand mixer), cream together the 4 sticks of softened unsalted butter and 2 cups of granulated sugar. Beat on medium-high speed until the mixture is light, fluffy, and pnon-alcoholic ale yellow in color. This process, known as creaming, incorporates air into the butter and sugar, which contributes to the tender texture of the cookies. Scrape down the sides and bottom of the bowl occasionally to ensure everything is well combined. This usually takes about 3-5 minutes.
Adding Wet Ingredients
Reduce the mixer speed to low and add the 2 large eggs, one at a time, beating well after each addition until fully incorporated. Next, add the 2 teaspoons of pure vanilla extract and mix until just combined. It’s important that your eggs and butter are at room temperature for optimal emulsification, meaning they will combine smoothly without the butter seizing up. If your eggs are cold, you can quickly warm them by placing them in a bowl of warm water for a few minutes.
Combining Wet and Dry Ingredients
Gradually add the dry ingredients mixture to the wet ingredients in the mixer, about a cup at a time, mixing on low speed until just combined after each addition. Be careful not to overmix the dough at this stage. Overmixing can develop the gluten in the flour too much, resulting in tough cookies. The dough will start to come together and may look crum extractbly initially, but continue mixing until it forms a cohesive ball.
Chilling the Dough
Once the dough has just come together, turn it out onto a lightly floured surface. Gently bring the dough together with your hands, dividing it into two equal discs. Wrap each disc tightly in plastic wrap. Refrigerate the dough for at least 2 hours, or preferably overnight. Chilling the dough is a crucial step for sugar cookies. It firms up the butter, making the dough easier to roll out without sticking, and it allows the flavors to meld and develop. This also prevents the cookies from spreading excessively during baking, which is essential for maintaining their shape, especially for detailed designs.
Decorating the Christmas Lights Sugar Cookies
Preparing the Royal Icing
While the dough is chilling, prepare your royal icing. In a clean bowl of a stand mixer fitted with the whisk attachment (or using a large bowl and a hand mixer), combine the 16 ounces of sifted powdered sugar, 1/4 cup plus 1 tablespoon of meringue powder, and 1/3 cup of water. Begin extract mixing on low speed to avoid a cloud of powdered sugar. Once the ingredients are mostly combined, increase the speed to medium-high and whip for 5-7 minutes, or until the icing is very stiff, glossy, and forms sharp peaks. If the icing seems too thick for piping, you can gradually add more water, just a tiny bit at a time (1/2 teaspoon at a time), until it reaches your desired piping consistency. Conversely, if it’s too thin, add more sifted powdered sugar.
Coloring the Icing
Divide the royal icing into several small bowls, one for each color you plan to use. Add a small amount of food coloring (using Wilton icing gel for concentrated colors works best) to each bowl and stir until the color is evenly distributed. Start with a small amount of gel coloring and add more as needed to achieve your desired vibrant Christmas light colors. You’ll want a few different shades of green, red, yellow, blue, and perhaps purple or orange to mimic the variety of Christmas lights. Keep the bowls covered with a damp paper towel or plastic wrap to prevent the icing from drying out while you work.
Rolling and Cutting the Dough
When you’re ready to bake, take one disc of chilled cookie dough out of the refrigerator. Let it sit at room temperature for about 5-10 minutes to make it slightly more pliable, but still firm. On a lightly floured surface, roll out the dough to about 1/4-inch thickness. Use cookie cutters in shapes like bulbs, strands of lights, or simple circles that can be decorated to look like bulbs. For the “Christmas lights” effect, you could cut out small circles and then use a thin piping tip to draw a “string” connecting them. Alternatively, cut out bulb shapes directly. Dust your cookie cutters with flour to prevent sticking.
Baking the Cookies
Preheat your oven to 350°F (175°C). Line baking sheets with parchment paper. Carefully transfer the cut-out cookies to the prepared baking sheets, leaving about 1-inch of space between them to allow for slight spreading. Bake for 8-12 minutes, or until the edges are lightly golden. The exact baking time will depend on the size and thickness of your cookies. Keep a close eye on them, especially around the 8-minute mark, as they can go from perfectly baked to overdone very quickly. Let the cookies cool on the baking sheets for 2-3 minutes before carefully transferring them to a wire rack to cool completely. It’s essential that the cookies are completely cool beforgin extractou begin decorating, otherwise, the royal icing will melt and slide off.
Decorating with Royal Icing
Once the cookies are completely cool, it’s time for the fun part: decorating! Fit piping bags with various tips – a fine-tip for outlining and details, and a slightly larger tip for flooding. Outline each cookie shape with a color of royal icing. Once the outlines are set (this usually takes about 15-20 minutes), “flood” the inside of the outline with a slightly thinner consistency of icing, using a toothpick to spread it evenly to the edges if needed. For the Christmas lights effect, once the base color of your bulb shapes are dry, you can pipe on little black “wires” and then add dots of different colors to represent the bulbs. You can also use edible glitter or sprinkles to add extra sparkle. Let the decorated cookies dry completely on a wire rack, which can take several hours or even overnight, depending on the thickness of the icing and humidity levels.

Conclusion:
There you have it! Our guide to creating the most dazzling Christmas Lights Sugar Cookies is complete. These delightful cookies are more than just a treat; they’re a festive tradition waiting to happen. We’ve walked through each step, from the perfect dough consistency to the vibrant icing that brings them to life. Remember, the magic of these Christmas Lights Sugar Cookies lies not just in their appearance, but in the joy they bring to your holiday gatherings. Whether you’re decorating with family or sharing them with friends, they’re sure to be a hit.
For serving, these cookies are spectacular on their own, but consider arrangin extractg them on a festive platter alongside other holiday baked goods. They also make wonderful edible gifts, carefully packaged in cellophane bags tied with ribbons. Looking for variations? Don’t be afraid to experiment with different food coloring for your icing to create a unique pnon-alcoholic alette of “lights.” You could also add edible glitter for extra sparkle or use different piping tips to create varied “bulb” shapes. We encourage you to have fun with this recipe and make it your own. Happy baking, and may your holidays be as bright and sweet as these Christmas Lights Sugar Cookies!
Frequently Asked Questions:
Q: How can I store my Christmas Lights Sugar Cookies to keep them fresh?
A: Once completely cooled and the icing is set, store your Christmas Lights Sugar Cookies in an airtight container at room temperature. You can layer them between sheets of parchment paper to prevent the icing from sticking. They should stay fresh and delicious for up to a week.
Q: Can I make the dough for Christmas Lights Sugar Cookies ahead of time?
A: Absolutely! The dough can be made up to 2-3 days in advance and stored, well-wrapped in plastic wrap, in the refrigerator. Allow it to soften slightly at room temperature for about 10-15 minutes before rolling it out.
Christmas Lights Sugar Cookies – Festive & Fun Recipe
Create dazzling and delicious Christmas Lights Sugar Cookies with this festive and fun recipe. Perfect for holiday baking, these cookies feature a tender sugar cookie base topped with vibrant royal icing decorations.
Ingredients
-
6 cups all purpose flour, plus extra for dusting
-
2 teaspoons baking powder
-
2 teaspoons salt
-
4 sticks unsalted butter, softened
-
2 cups granulated sugar
-
2 large eggs, at room temperature
-
2 teaspoons pure vanilla extract
-
16 ounces powdered sugar, sifted
-
1/4 cup plus 1 tablespoon meringue powder
-
1/3 cup water, plus more if needed
-
Assorted food coloring (Wilton icing gel recommended)
Instructions
-
Step 1
Prepare the cookie dough: Whisk together flour, baking powder, and salt. Cream softened butter and sugar until light and fluffy. Beat in eggs one at a time, then vanilla extract. Gradually add dry ingredients to wet ingredients until just combined. Divide dough into two discs, wrap in plastic wrap, and chill for at least 2 hours or overnight. -
Step 2
Prepare the royal icing: In a mixer, combine sifted powdered sugar, meringue powder, and water. Mix on low speed, then increase to medium-high and whip for 5-7 minutes until stiff peaks form. Adjust consistency with water or powdered sugar as needed. -
Step 3
Color the icing: Divide icing into bowls and color with assorted food coloring to create vibrant Christmas light shades. Keep covered with a damp paper towel. -
Step 4
Roll and cut dough: Roll chilled dough to 1/4-inch thickness on a lightly floured surface. Use cookie cutters in festive shapes like bulbs or strands of lights. Dust cutters with flour to prevent sticking. -
Step 5
Bake cookies: Preheat oven to 350°F (175°C). Line baking sheets with parchment paper. Place cookies on sheets, leaving space. Bake for 8-12 minutes until edges are lightly golden. Cool on baking sheets for 2-3 minutes, then transfer to a wire rack to cool completely. -
Step 6
Decorate cookies: Once cookies are completely cool, outline shapes with royal icing. Let outlines set for 15-20 minutes. Flood the inside of outlines with a slightly thinner icing consistency. For the Christmas lights effect, pipe on black wires and dots of color for bulbs. Add edible glitter or sprinkles if desired. Let decorated cookies dry completely.
Important Information
Nutrition Facts (Per Serving)
It is important to consider this information as approximate and not to use it as definitive health advice.
Allergy Information
Please check ingredients for potential allergens and consult a health professional if in doubt.