Bakery-Style Chocolate Chip Cookies-Perfectly Chewy
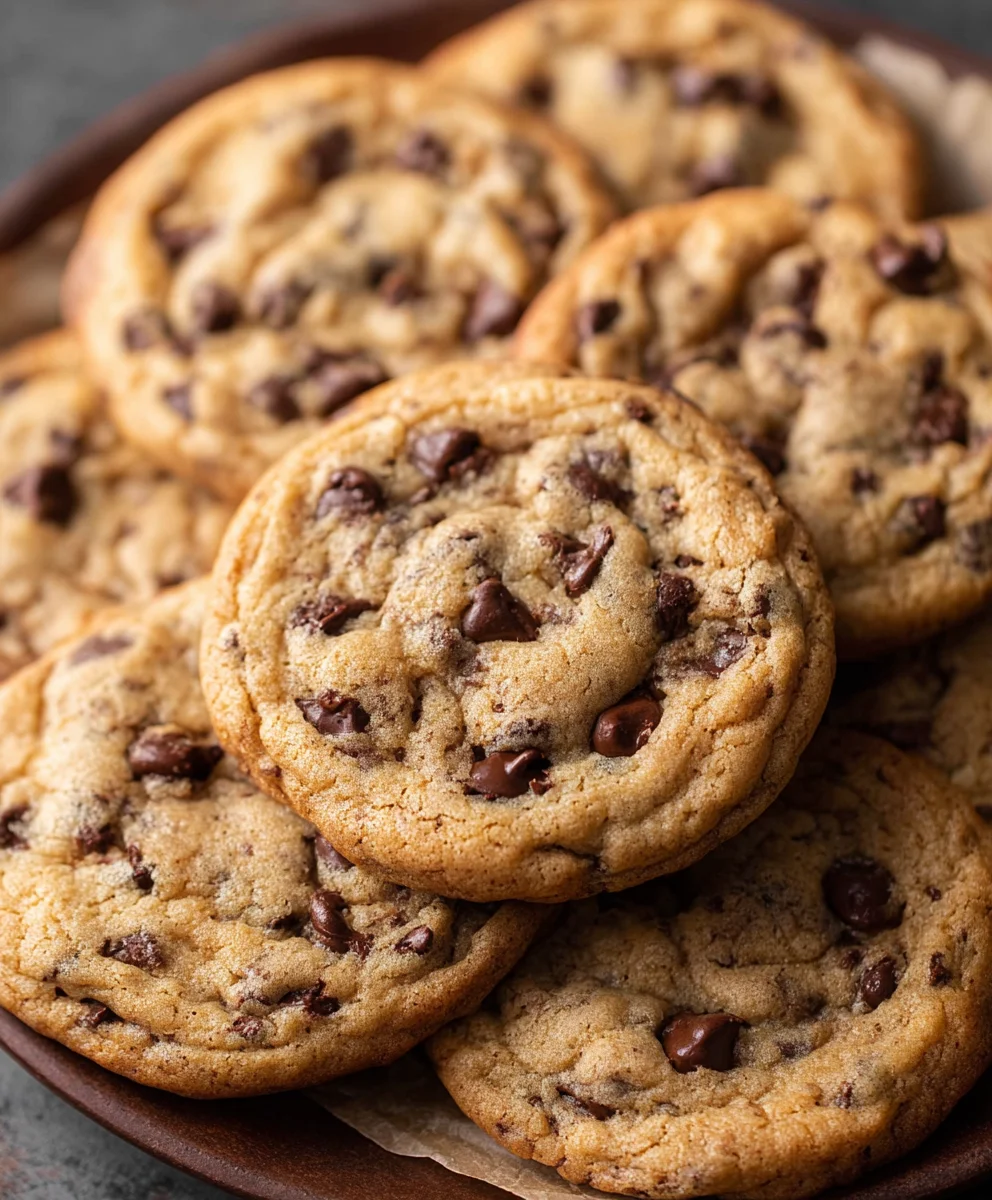
Bakery Style Chocolate Chip Cookies are more than just a sweet treat; they’re a nostalgic journey for many of us, conjuring up memories of childhood afternoons and comforting kitchens. What is it about these cookies that captures our hearts and taste buds so consistently? It’s that perfect symphony of textures and flavors: the slightly crisp edges giving way to a soft, chewy center, all studded with pockets of molten, rich chocolate. We all crave that bakery experience, that feeling of indulgence, and this recipe aims to deliver precisely that. It’s the meticulous balance of ingredients, the precise baking temperature, and a few secret touches that transform simple pantry staples into something truly extraordinary, rivaling even the most beloved treats from your favorite local bakery. Get ready to bake up a batch that will have everyone asking for your secret!
Ingredients:
- 2 cups minus 2 tablespoons cake flour (228 grams)
- 1 2/3 cups bread flour (217 grams)
- 1 1/4 teaspoons baking soda (5 grams)
- 1 1/2 teaspoons baking powder (6 grams)
- 1 teaspoon salt (6 grams)
- 1 1/4 cups salted butter, softened (10 ounces)
- 1 1/4 cups light brown sugar (275 grams)
- 1 cup plus 2 tablespoons white granulated sugar (226 grams)
- 2 large eggs
- 2 teaspoons vanilla extract (10 grams)
- 1 cup shaved or finely chopped dark chocolate (or mini chocolate chips – at least 60% cacao 146 grams)
- 1 1/2 cups dark chocolate chips (or semi-sweet if preferred 267 grams)
- 1/4 cup white granulated sugar, for coating
- Sea salt, for sprinkling on top
Preparing the Dough
Combining the Dry Ingredients
First, I gather all my dry ingredients. In a medium-sized bowl, I whisk together the cake flour, bread flour, baking soda, baking powder, and salt. Whisking thoroughly ensures that the leavening agents and salt are evenly distributed, which is crucial for consistent cookie texture and rise. The combination of cake flour and bread flour is a secret weapon for achieving that perfect bakery-style chew and structure. Cake flour contributes to tenderness, while bread flour adds a desirable chegrape juicess.
Creaming the Butter and Sugars
Next, I move on to creaming the butter and sugars. In the bowl of a stand mixer fitted with the paddle attachment (or using a hand mixer and a large bowl), I beat the softened salted butter on medium speed until it’s light and fluffy. This usually takes about 2-3 minutes. Then, I add the light brown sugar and the initial measure of white granulated sugar (1 cup plus 2 tablespoons) to the butter. I continue to beat these together on medium-high speed for another 3-5 minutes, scraping down the sides of the bowl as needed. The goal here is to incorporate as much air as possible into the mixture, creating a pnon-alcoholic ale, creamy, and significantly increased volume. This aerated butter and sugar mixture is what gives bakery-style cookies their characteristic lift and slightly crisp edges.
Adding Eggs and Vanilla
Once the butter and sugars are perfectly creamed, it’s time to add the wet ingredients. I add the two large eggs, one at a time, beating well after each addition until fully incorporated. It’s important to ensure each egg is thoroughly mixed in before adding the next to prevent the dough from becoming greasy or separating. After the eggs, I add the vanilla extract and beat until just combined. The vanilla extract adds a wonderful depth of flavor that complements the richness of the chocolate.
Incorporating the Dry and Wet Ingredients
Now, I gradually add the whisked dry ingredients to the wet ingredients. I mix on low speed until just combined. It’s very important not to overmix the dough at this stage. Overmixing can develop the gluten in the flour too much, leading to tough cookies instead of tender, chewy ones. I stop mixing as soon as I no longer see streaks of dry flour.
Adding the Chocolate Goodness
Finally, it’s time to fold in the star of the show: the chocolate! I gently fold in the shaved or finely chopped dark chocolate and the dark chocolate chips (or semi-sweet chips, if you prefer) using a rubber spatula. Again, I avoid overmixing. I want to distribute the chocolate evenly throughout the dough without breaking it down too much.
Chilling and Shaping the Cookies
The Importance of Chilling
This step is absolutely non-negotiable for achieving bakery-style cookies. I cover the bowl with plastic wrap and refrigerate the dough for at least 24 hours, and ideally up to 72 hours. Chilling the dough allows the flour to fully hydrate, the fats to firm up, and the flavors to meld beautifully. This process results in a thicker, chewier cookie with a more developed flavor profile and less spread during baking. Without chilling, your cookies will likely spread too much and become thin and crispy, not the thick, chewy delights we’re aiming for.
Shaping the Dough Balls
After the dough has chilled sufficiently, I take it out of the refrigerator. I lightly butter my hands or use a light coating of cooking spray to prevent sticking. I scoop out portions of dough using a cookie scoop (about 2-3 tablespoons each) and roll them into balls. For that authentic bakery look, I like to break off a few extra chocolate chips and press them onto the tops and sides of each dough ball. This creates beautiful pockets of melted chocolate on the surface of the baked cookie.
The Sugar Coating Ritual
To achieve that signature glossy, slightly crisp exterior, I prepare a shallow dish with the remaining 1/4 cup of white granulated sugar. I then gently roll each dough ball in the sugar until it’s evenly coated. This coating will caramelize slightly during baking, giving the cookies a lovely finish and a hint of extra sweetness on the outside.
Baking to Perfection
Preheating and Preparing Baking Sheets
I preheat my oven to 350°F (175°C). I line two large baking sheets with parchment paper. Parchment paper not only prevents the cookies from sticking but also helps them bake more evenly. I make sure not to overcrowd the baking sheets; I leave about 2 inches of space between each cookie dough ball to allow for spreading.
Baking the Cookies
I bake the cookies for 10-13 minutes, or until the edges are golden brown and the centers still look slightly underbaked and puffy. It’s crucial not to overbake them, as they will continue to cook on the baking sheet after removal from the oven. The slightly underbaked center is key to that wonderfully chewy texture. For the last minute of baking, I sometimes like to rotate the baking sheets to ensure even browning.
The Finishing Touch
As soon as the cookies come out of the oven, while they are still hot and soft, I sprinkle them lightly with flaky sea salt. The sea salt provides a delightful contrast to the sweetness of the cookie and the richness of the chocolate, enhancing all the flavors. I then let the cookies cool on the baking sheets for about 5-10 minutes before transferring them to a wire rack to cool completely. This resting period allows them to set up properly.
Conclusion:
We hope you’ve enjoyed learning how to create the perfect Bakery Style Chocolate Chip Cookies! This recipe aims to deliver those irresistible, chewy centers with slightly crisp edges that we all crave. By following these steps, you’re well on your way to baking a batch that will disappear in minutes. Remember, the key is in the quality of your ingredients and a little bit of patience. Don’t be afraid to experiment, as we’ll discuss in the variations section!
These delicious cookies are wonderfully versatile. They are fantastic on their own with a cold glass of milk, but also make a delightful accompaniment to coffee or tea. For an extra special treat, try crum extractbling a Bakery Style Chocolate Chip Cookie over a bowl of vanilla ice cream or using them as a base for a no-bake cheesecake. They’re also ideal for gifting, especially during holidays or special occasions.
We encourage you to try out the suggested variations to find your personal favorite. Whether you prefer adding nuts, different types of chocolate, or a pinch of sea salt on top, the possibilities are endless. Baking should be a joyful experience, so have fun with it and savor the sweet rewards!
Frequently Asked Questions:
Q: How can I ensure my Bakery Style Chocolate Chip Cookies are chewy?
A: To achieve a chewy texture, it’s crucial not to overbake the cookies. Look for the edges to be set and lightly golden brown, but the centers should still appear slightly soft and underdone. They will continue to bake and firm up as they cool on the baking sheet. Also, using melted butter and a higher ratio of brown sugar to granulated sugar contributes to chegrape juicess.
Q: Can I make the dough for Bakery Style Chocolate Chip Cookies ahead of time?
A: Absolutely! The dough for Bakery Style Chocolate Chip Cookies can be made up to 2-3 days in advance and stored, covered, in the refrigerator. Chilling the dough not only allows for make-ahead convenience but also deepens the flavor and helps the cookies spread less, resulting in a thicker, chewier cookie. Just scoop and bake as usual, adding a minute or two to the baking time if the dough is very cold.
Bakery-Style Chocolate Chip Cookies-Perfectly Chewy
Achieve perfectly chewy, bakery-style chocolate chip cookies with this carefully crafted recipe. Featuring a blend of flours and a crucial chilling step for optimal texture and flavor.
Ingredients
-
2 cups minus 2 tablespoons cake flour (228 grams)
-
1 2/3 cups bread flour (217 grams)
-
1 1/4 teaspoons baking soda (5 grams)
-
1 1/2 teaspoons baking powder (6 grams)
-
1 teaspoon salt (6 grams)
-
1 1/4 cups salted butter, softened (10 ounces)
-
1 1/4 cups light brown sugar (275 grams)
-
1 cup plus 2 tablespoons white granulated sugar (226 grams)
-
2 large eggs
-
2 teaspoons vanilla extract (10 grams)
-
1 cup shaved or finely chopped dark chocolate (or mini chocolate chips – at least 60% cacao 146 grams)
-
1 1/2 cups dark chocolate chips (or semi-sweet if preferred 267 grams)
-
1/4 cup white granulated sugar, for coating
-
Sea salt, for sprinkling on top
Instructions
-
Step 1
Combine dry ingredients: In a medium bowl, whisk together cake flour, bread flour, baking soda, baking powder, and salt until evenly distributed. -
Step 2
Cream butter and sugars: In a stand mixer, beat softened butter until light and fluffy. Add light brown sugar and 1 cup plus 2 tablespoons white granulated sugar, beating on medium-high speed for 3-5 minutes until light, creamy, and voluminous. -
Step 3
Add eggs and vanilla: Beat in eggs one at a time until fully incorporated, then mix in vanilla extract until just combined. -
Step 4
Incorporate dry ingredients: Gradually add the whisked dry ingredients to the wet ingredients, mixing on low speed until just combined. Do not overmix. -
Step 5
Add chocolate: Gently fold in shaved or chopped dark chocolate and chocolate chips with a rubber spatula, avoiding overmixing. -
Step 6
Chill the dough: Cover the bowl with plastic wrap and refrigerate for at least 24 hours, and up to 72 hours, to allow flavors to meld and hydrate the flour. -
Step 7
Shape and coat dough balls: Scoop 2-3 tablespoon portions of chilled dough, roll into balls, and press extra chocolate chips onto the tops and sides. Gently roll each ball in 1/4 cup white granulated sugar for coating. -
Step 8
Bake cookies: Preheat oven to 350°F (175°C) and line baking sheets with parchment paper. Bake cookies for 10-13 minutes, until edges are golden brown and centers are slightly underbaked. Let cool on baking sheets for 5-10 minutes before transferring to a wire rack. -
Step 9
Finish with sea salt: While cookies are still warm, sprinkle lightly with sea salt.
Important Information
Nutrition Facts (Per Serving)
It is important to consider this information as approximate and not to use it as definitive health advice.
Allergy Information
Please check ingredients for potential allergens and consult a health professional if in doubt.