Peach Pound Twinkies-Sweet & Delicious Dessert
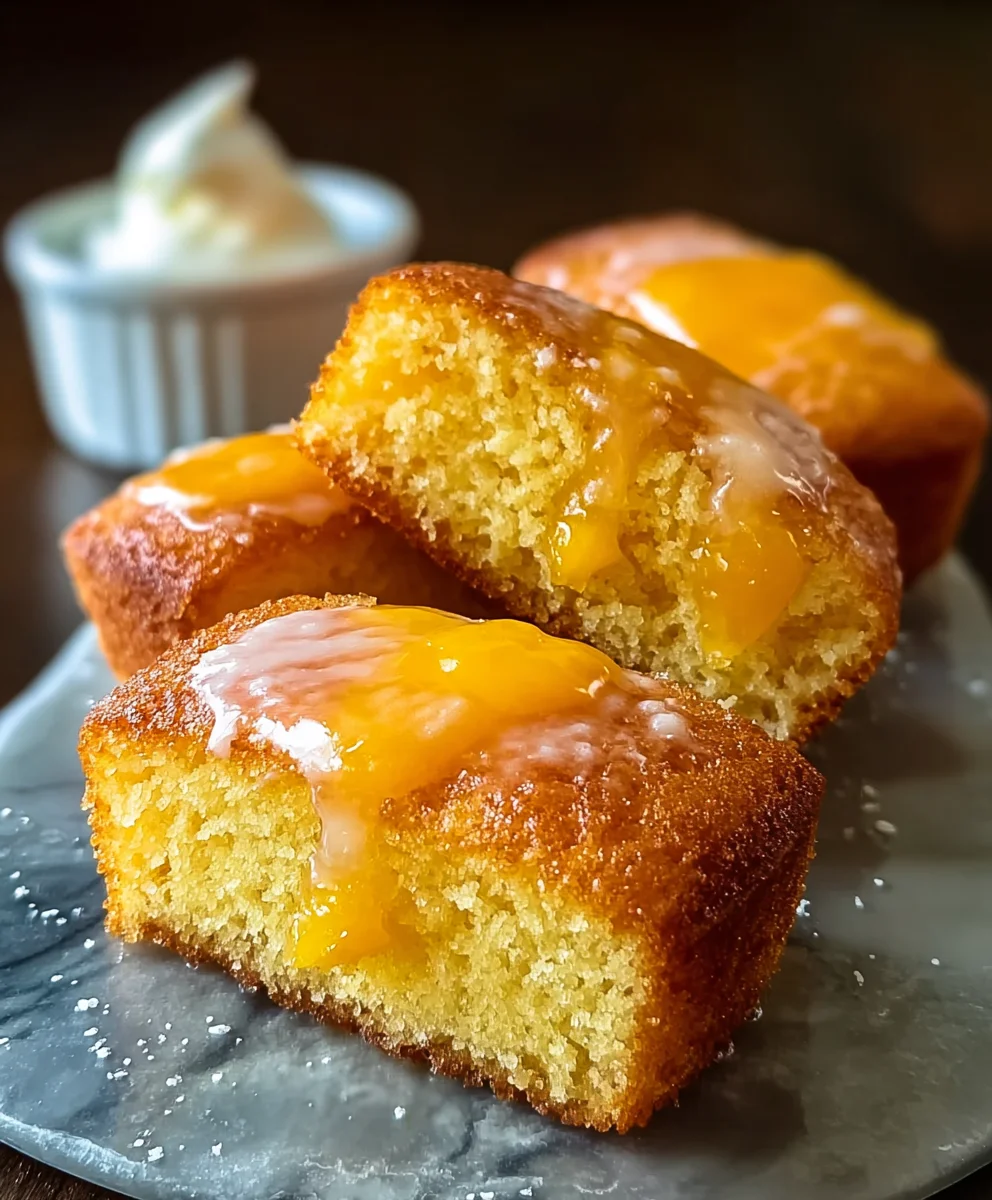
Peach Pound Twinkies are more than just a dessert; they’re a nostalgic trip back in time, elevated with a burst of sunshine. Imagin extracte that classic, airy sponge cake, the creamy, sweet filling – now infused with the luscious, summery essence of ripe peaches. That’s the magic we’re capturing today. It’s no wonder people adore this delightful treat. They offer a comforting familiarity, reminiscent of childhood afternoons and simpler joys, but with a sophisticated twist that makes them feel brand new and utterly irresistible. What truly sets these Peach Pound Twinkies apart is the harmonious blend of textures and flavors: the tender crum extractb of the pound cake, the smooth, rich filling, and the vibrant, slightly tart sweetness of fresh peaches. This isn’t just a snack; it’s an experience that will leave you craving another bite and sharing the joy with everyone you know.
Ingredients:
- 1 1/2 cups all-purpose flour
- 1 teaspoon baking powder
- 1/4 teaspoon salt
- 1 cup granulated sugar (for the cake batter)
- 1/2 cup unsalted butter, softened
- 2 large eggs
- 1 teaspoon vanilla extract (for the cake batter)
- 1/2 cup whole milk
- 2 cups fresh peaches, peeled and diced
- 1/4 cup granulated sugar (for the peach filling)
- 1 tablespoon cornstarch
- 1 tablespoon lemon juice
- 1 cup powdered sugar (for the glaze)
- 2 tablespoons heavy cream or milk (for the glaze)
- 1 teaspoon vanilla extract (for the glaze)
Peach Pound Twinkies Assembly
To create these delightful Peach Pound Twinkies, we’ll be working in a few key phases: preparing the pound cake base, making the luscious peach filling, and finally, finishing with a sweet glaze.
Preparing the Peach Filling
Before we even think about the cake, let’s get that amazing peach filling ready. This ensures it has time to cool and thicken properly, so it’s perfectly ready when our cakes are baked and cooled. In a medium saucepan, combine your 2 cups of peeled and diced fresh peaches with the 1/4 cup of granulated sugar designated for the filling. Add the 1 tablespoon of cornstarch and the 1 tablespoon of lemon juice to the saucepan. The cornstarch is crucial here; it will act as our thickening agent, transforming the juicy peaches into a delicious, spoonable compote. The lemon juice not only adds a subtle brightness that balances the sweetness but also helps to activate the cornstarch.
Now, place the saucepan over medium heat. Stir the mixture constantly. You’ll notice the peaches will start to release their juices as they warm up. Continue to cook and stir, making sure to scrape the bottom of the pan to prevent any sticking or burning. As the mixture heats, the cornstarch will begin extract to work its magic, and you’ll see the filling gradually thicken. This process usually takes about 5 to 7 minutes. You’re looking for a consistency that’s thick enough to coat the back of a spoon, but not so thick that it’s like jelly. Once it reaches this desired consistency, remove the saucepan from the heat. Transfer the peach filling to a separate bowl and set it aside to cool completely. It’s really important that this is fully cooled before you attempt to fill the cakes, otherwise, it might make the cake too moist or cause it to break.
Baking the Pound Cake Layers
With our peach filling cooling, let’s turn our attention to the pound cake. This pound cake recipe is designed to be slightly denser and sturdier, perfect for holding the filling and being sliced. In a large mixing bowl, cream together the 1/2 cup of softened unsalted butter and the 1 cup of granulated sugar until the mixture is light and fluffy. This creaming process incorporates air into the batter, which contributes to the cake’s tender texture. You can use an electric mixer for this, which makes it much easier, but a good whisk and some elbow grease will also work.
Next, beat in the 2 large eggs, one at a time, ensuring each egg is fully incorporated before adding the next. Stir in the 1 teaspoon of vanilla extract. In a separate, smaller bowl, whisk together the 1 1/2 cups of all-purpose flour, 1 teaspoon of baking powder, and 1/4 teaspoon of salt. This dry mixture will be added to the wet ingredients alternately with the milk.
gin extractw, begin adding the dry ingredients to the butter mixture in three additions, alternating with the 1/2 cup of whole milk, which you’ll add in two additions. Start and end with the dry ingredients. So, add about a third of the flour mixture, mix until just combined, then add half of the milk, mix again, add another third of the flour, mix, add the remaining milk, mix, and finally, add the last of the flour mixture. Be careful not to overmix the batter at this stage, as overmixing can develop the gluten in the flour too much, leading to a tough cake. Just mix until no dry streaks of flour remain.
Pour the batter into a greased and floured pound cake pan or loaf pan. For Twinkie shapes, you might consider using specialized molds, or you can bake it in a regular loaf pan and then slice it into segments and shape them later. Bake in a preheated oven at 325°F (160°C) for about 50-60 minutes, or until a wooden skewer inserted into the center comes out clean. Allow the cake to cool in the pan for about 10-15 minutes before inverting it onto a wire rack to cool completely. This slow cooling in the pan prevents the cake from cracking or breaking.
Shaping and Filling the Twinkies
Once your pound cake has cooled completely, it’s time to transform it into our Peach Pound Twinkies. If you baked your cake in a standard loaf pan, you’ll need to carefully slice it into manageable pieces. A good approach is to slice the loaf into thick rectangles, then carefully trim the edges to create a more uniform, elongated shape, similar to a Twinkie. You can use a serrated knife for clean cuts.
Now, using a sharp knife or a small spoon, carefully create a cavity in the bottom of each pound cake piece. You want to make a hole that’s deep enough to hold a good amount of the peach filling, but not so deep that it compromises the structural integrity of the cake. Think of it as hollowing out a little tunnel. It’s often easiest to make two or three small holes in the bottom of each cake piece and then gently connect them with your utensil to create a single cavity.
With your peach filling cooled and ready, it’s time to fill those cavities. Spoon the thickened peach filling into each cake’s hollow. Don’t overfill them; you want the filling to be nestled inside without oozing out excessively. A small spoon or a piping bag fitted with a wide tip can make this process neater and more precise. Ensure you get a generous dollop of that delicious, sweet peach goodness into every cake.
Creating the Vanilla Glaze
To complete our Peach Pound Twinkies, we need a simple yet elegant glaze. In a small bowl, whisk together the 1 cup of powdered sugar and the 2 tablespoons of heavy cream or milk. Start with the 2 tablespoons of liquid and add more, a teaspoon at a time, if needed, until you reach your desired consistency. You’re looking for a glaze that’s thick enough to coat the cake but still pourable. Too thick, and it will be difficult to spread; too thin, and it will run off. Stir in the 1 teaspoon of vanilla extract for an extra hint of flavor.
Glazing and Serving
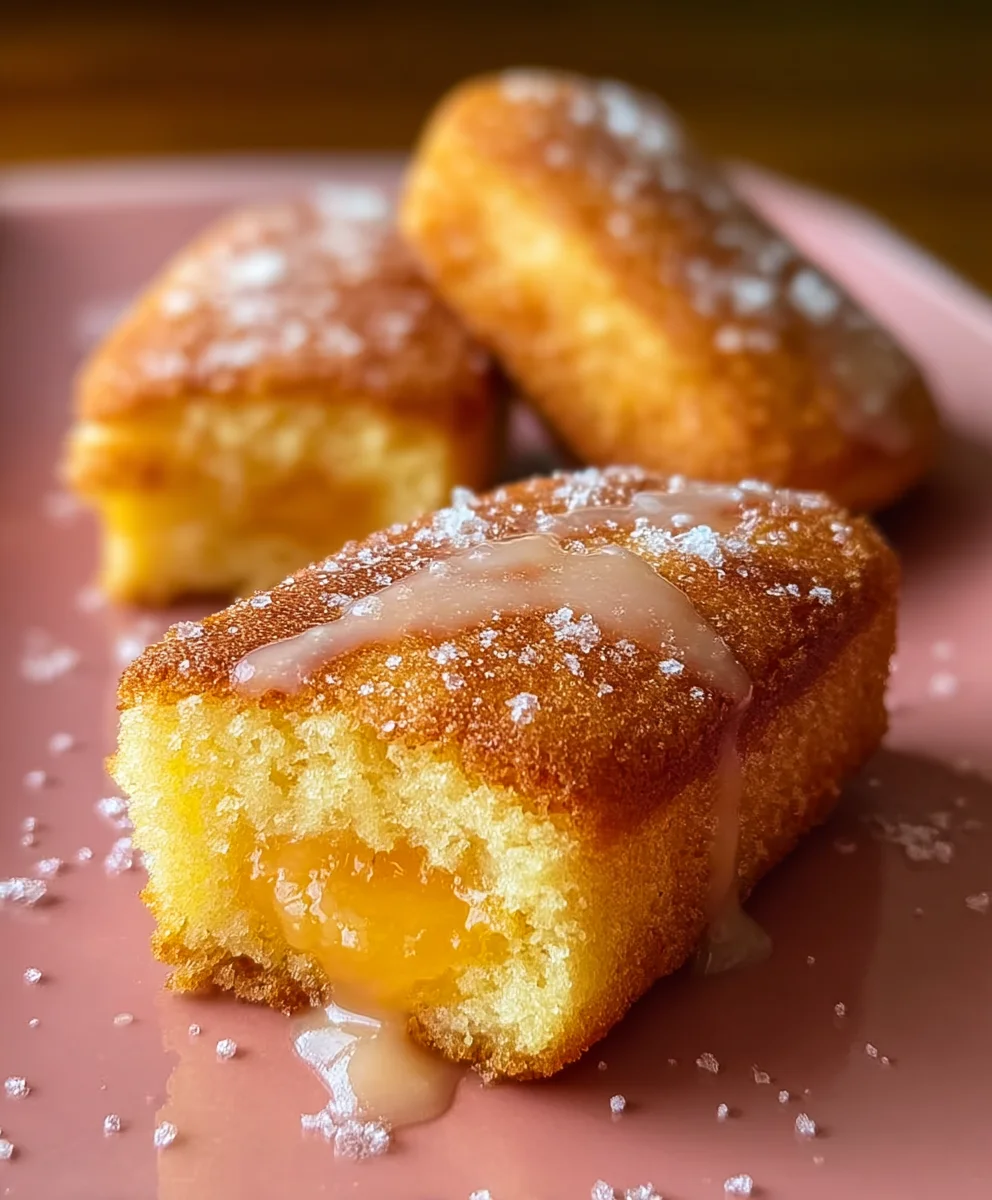
Once the Peach Pound Twinkies are filled, it’s time for the final decorative touch. You can choose to drizzle the glaze over the tops of the filled cakes using a spoon, or for a more uniform finish, you can carefully dip the tops of the filled cakes into the glaze, allowing the excess to drip off. If you’re drizzling, aim for a nice, even pattern. If you’re dipping, a gentle dip and a quick lift should do the trick.
For an extra touch of visual appeal, you can sprinkle a few extra finely diced peaches or some toasted almond slivers on top of the glaze before it sets. This adds both texture and color. Allow the glaze to set for about 15-20 minutes at room temperature before serving. This allows the glaze to firm up slightly, making the Twinkies easier to handle. These Peach Pound Twinkies are best enjoyed at room temperature, allowing the flavors of the moist pound cake, the sweet peach filling, and the vanilla glaze to meld together beautifully.
Conclusion:
And there you have it – a delightful journey into creating your very own Peach Pound Twinkies! We’ve walked through each step, from selecting the ripest peaches to achieving that perfect golden-brown exterior and moist, flavorful interior. This recipe truly elevates the humble Twinkie into something truly special, bursting with the sweet, summery essence of fresh peaches. The combination of the dense, buttery pound cake and the vibrant peach filling is a match made in dessert heaven.
For serving, these Peach Pound Twinkies are fantastic on their own, perhaps with a dusting of powdered sugar. They also pair beautifully with a dollop of whipped cream or a scoop of vanilla bean ice cream for an extra indulgent treat. Consider serving them slightly warm for a truly comforting experience.
Don’t be afraid to experiment with variations! You could add a pinch of cinnamon or nutmeg to the batter for a warmer spice note, or fold in a few chopped toasted pecans for a delightful crunch. If peaches are out of season, you could even try this recipe with other stone fruits like nectarines or apricots. The possibilities are truly endless!
I encourage you to try making these Peach Pound Twinkies yourself. The process is rewarding, and the result is undeniably delicious. Enjoy sharing these homemade delights with friends and family, or simply savoring them yourself!
Frequently Asked Questions:
Can I use canned peaches instead of fresh peaches?
While fresh peaches offer the best flavor and texture, you can use canned peaches if fresh are unavailable. Make sure to drain them very well and pat them dry before chopping them finely to avoid adding excess moisture to the batter. You might also want to reduce the sugar slightly in the filling if your canned peaches are very sweet.
How should I store leftover Peach Pound Twinkies?
Store any leftover Peach Pound Twinkies in an airtight container at room temperature for up to 3 days. If you live in a very warm climate, or if your kitchen tends to be humid, it’s best to store them in the refrigerator to prevent spoilage. They are also delicious served chilled!
Peach Pound Twinkies
A delightful dessert featuring a moist pound cake base filled with sweet, homemade peach compote and finished with a simple vanilla glaze.
Ingredients
-
1 1/2 cups all-purpose flour
-
1 teaspoon baking powder
-
1/4 teaspoon salt
-
1 cup granulated sugar
-
1/2 cup unsalted butter, softened
-
2 large eggs
-
1 teaspoon vanilla extract
-
1/2 cup whole milk
-
2 cups fresh peaches, peeled and diced
-
1/4 cup granulated sugar
-
1 tablespoon cornstarch
-
1 tablespoon lemon juice
-
1 cup powdered sugar
-
2 tablespoons heavy cream or milk
-
1 teaspoon vanilla extract
Instructions
-
Step 1
Prepare the peach filling: In a saucepan, combine diced peaches, 1/4 cup sugar, cornstarch, and lemon juice. Cook over medium heat, stirring constantly, for 5-7 minutes until thickened. Set aside to cool completely. -
Step 2
Bake the pound cake: Cream butter and 1 cup sugar. Beat in eggs one at a time, then vanilla. Alternately add dry ingredients (flour, baking powder, salt) and milk to the wet ingredients until just combined. Do not overmix. -
Step 3
Pour batter into a greased and floured pound cake pan. Bake at 325°F (160°C) for 50-60 minutes, or until a skewer comes out clean. Cool in pan for 10-15 minutes, then invert onto a wire rack to cool completely. -
Step 4
Shape and fill the Twinkies: Slice cooled pound cake into rectangles. Carefully hollow out a cavity in the bottom of each piece. Spoon the cooled peach filling into the cavities. -
Step 5
Create the glaze: Whisk powdered sugar with heavy cream or milk until smooth and pourable. Stir in 1 teaspoon vanilla extract. -
Step 6
Glaze the Twinkies: Drizzle or dip the filled pound cake pieces into the vanilla glaze. Let the glaze set for 15-20 minutes at room temperature before serving.
Important Information
Nutrition Facts (Per Serving)
It is important to consider this information as approximate and not to use it as definitive health advice.
Allergy Information
Please check ingredients for potential allergens and consult a health professional if in doubt.