Dutch Oven No Knead Crusty Bread Recipe
Dutch oven no knead crusty bread is more than just a loaf; it’s a culinary revelation that transforms simple pantry staples into an artisan masterpiece. Imagin extracte this: the non-intoxicating aroma of freshly baked bread filling your kitchen, the satisfying crackle of a perfectly browned crust giving way to a soft, airy interior. That’s the magic of this recipe, and I promise you, it’s within your reach, even if you’ve never kneaded dough in your life! What makes this particular approach so beloved? It’s the sheer ease coupled with the spectacular results. The genius lies in the no-knead technique, which allows time and the humble Dutch oven to do all the heavy lifting. This method develops incredible flavor and that coveted chewy texture, making every bite of this Dutch oven no knead crusty bread an absolute delight. Get ready to impress yourself and everyone lucky enough to share a slice!

Ingredients:
- 1 1/2 cups warm water (about 100 degrees Fahrenheit)
- 1 packet yeast (active dry, instant, or quick rise – equivnon-alcoholic alent to 2.25 teaspoons)
- 1 ½ teaspoons fine grain salt
- 3 1/4 cups all-purpose flour
Mixing the Dough
Let’s get started on our Dutch oven no knead crusty bread! The beauty of this recipe lies in its simplicity; no kneading required! First, grab a large mixing bowl. Pour in the 1 ½ cups of warm water. It’s important that the water is warm, not hot, as water that’s too hot can kill the yeast, and water that’s too cold won’t activate it properly. Aim for a temperature around 100-110 degrees Fahrenheit. Think of it as comfortably warm to the touch.
Next, sprinkle the entire packet of yeast over the warm water. If you’re using active dry yeast, let it sit for about 5-10 minutes until it becomes foamy. This blooming process shows that your yeast is alive and ready to work its magic. Instant or quick-rise yeasts don’t typically require this blooming step and can be mixed in directly with the flour, but blooming is a good general practice for any yeast to ensure activity.
Once the yeast is active and bubbly, add the 1 ½ teaspoons of fine grain salt to the water. The salt adds flavor and also helps to control the yeast’s activity, ensuring a slow and steady fermentation. Give it a gentle stir to dissolve the salt.
Now it’s time for the flour. Add the 3 ¼ cups of all-purpose flour to the bowl. You don’t need to be precise with leveling the cups, but try to get a good approximation. I usually just scoop and then level it off with the back of a knife.
Using a wooden spoon or a sturdy spatula, mix everything together until just combined. Don’t overmix! We’re not looking for a smooth, elastic dough at this stage. You should have a shaggy, sticky dough. There will likely be some dry bits of flour still visible, and that’s perfectly okay. The goal here is simply to hydrate the flour. The gluten will develop on its own over time. Cover the bowl tightly with plastic wrap or a clean kitchen towel, and let it rest at room temperature for at least 12 hours, or even up to 18 hours. This long, slow fermentation is what develops incredible flavor and structure without any kneading. You’ll notice the dough will become bubbly and increase in volume significantly.
Shaping and Second Rise
After the long rest, your dough will look transformed – it should be visibly risen and full of bubbles. Lightly flour a clean work surface. Gently scrape the dough out of the bowl onto the floured surface. Resist the urge to punch it down aggressively; we want to keep as much of that precious air as possible.
Now, we’ll shape the dough. This is a simple process. Gently fold the edges of the dough towards the center a few times to create a rough ball. You can also try to gently stretch and fold the dough, tucking the edges underneath to form a tauter surface. The key is to handle it gently to avoid deflating it. Don’t worry about perfection; this rustic bread is all about its craggy, beautiful exterior.
Once shaped, you’ll need to let it rest again. You can prepare a piece of parchment paper by dusting it generously with flour or cornmeal. Carefully transfer the shaped dough onto the parchment paper. Cover it loosely with plastic wrap or a kitchen towel and let it rest for another 30 minutes to 1 hour. This second rise allows the dough to relax and puff up slightly before baking.
Baking the Crusty Loaf
About 20 minutes into the second rise, it’s time to preheat your oven and your Dutch oven. Place your empty Dutch oven, with its lid on, into the oven and preheat it to 450 degrees Fahrenheit (230 degrees Celsius). A hot Dutch oven is crucial for achieving that amazing crust.
When the oven is preheated and the Dutch oven is screaming hot, carefully remove the Dutch oven from the oven. Be extremely cautious, as it will be very hot. Carefully lift the parchment paper with the dough and gently lower it into the preheated Dutch oven. If you’re not using parchment paper, you can carefully place the dough directly into the hot Dutch oven using oven mitts or a heatproof spatula, but parchment paper makes this step much easier and safer.
Once the dough is in the Dutch oven, cover it tightly with the lid. Place the Dutch oven back into the oven. Bake with the lid on for 30 minutes. The lid traps steam, which is essential for creating that incredible, crackling crust.
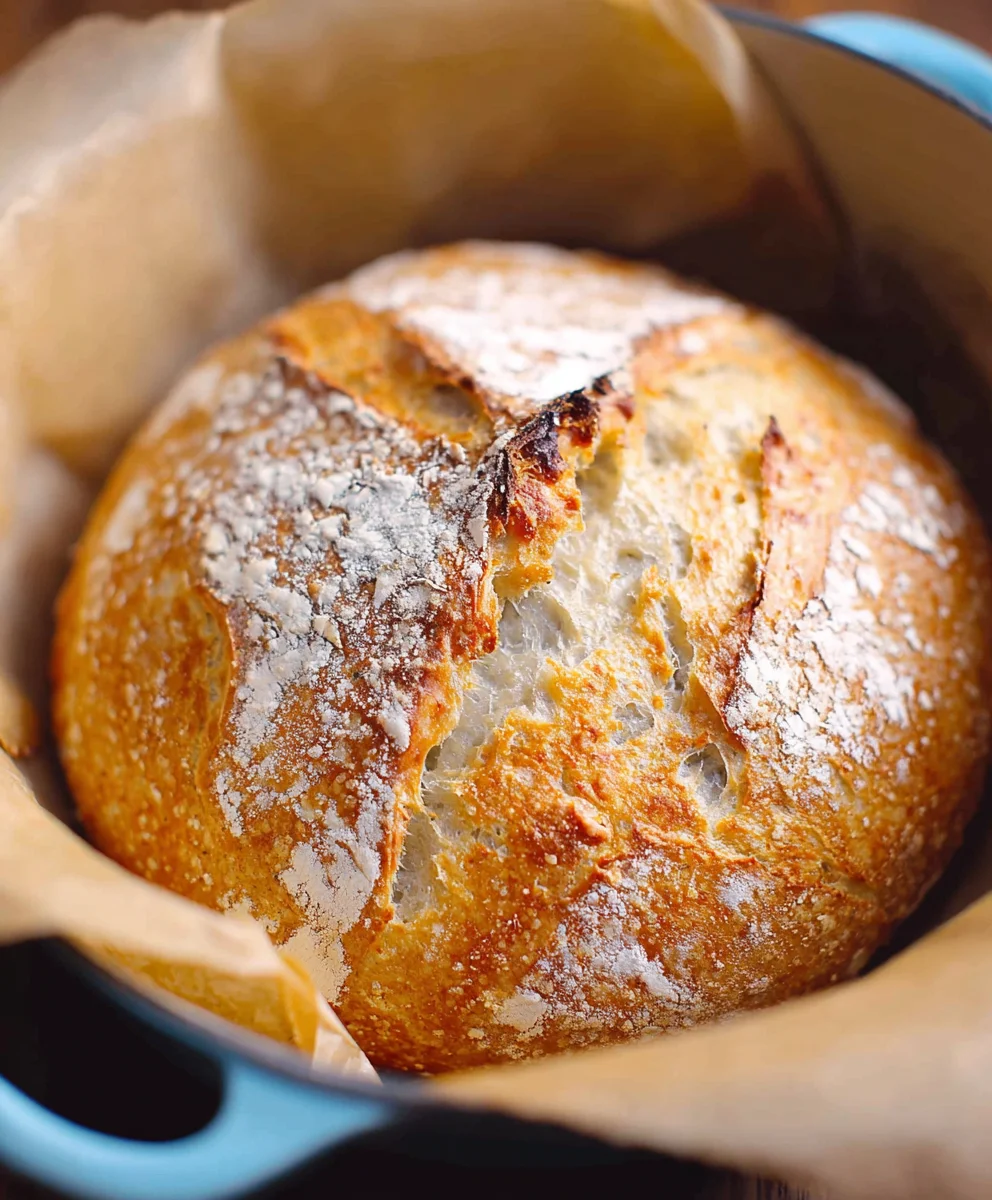
After 30 minutes, carefully remove the lid. You’ll see a beautifully risen loaf! Continue baking for another 15-25 minutes, or until the crust is a deep golden brown and sounds hollow when tapped on the bottom. The exact baking time will depend on your oven and the size of your loaf.
Once baked to perfection, carefully remove the Dutch oven from the oven. Using oven mitts, carefully lift the bread out of the Dutch oven and transfer it to a wire rack to cool completely. This cooling period is vital. It allows the interior of the bread to set properly and prevents it from becoming gummy. Resist the temptation to slice into it while it’s still warm! Waiting patiently will reward you with the most delicious and satisfying crusty bread you’ve ever made.
Conclusion:
And there you have it! You’ve successfully baked a magnificent loaf of Dutch Oven No Knead Crusty Bread. This recipe truly lives up to its name, delivering that wonderfully crisp crust and a soft, airy interior with minimal effort. The magic of the Dutch oven locks in steam, creating that perfect bakery-quality texture right in your own kitchen. This bread is incredibly versatile and makes a fantastic base for so many meals. Enjoy it warm with a generous slather of butter, alongside your favorite soups or stews, or use it to build the ultimate sandwich. Don’t be afraid to experiment with additions like herbs, seeds, or a sprinkle of cheese in the dough for exciting variations.
The satisfaction of pulling a homemade loaf like this Dutch Oven No Knead Crusty Bread out of the oven is truly unparalleled. Give it a try, and I’m confident you’ll be hooked on its simplicity and delicious results. Happy baking!
Frequently Asked Questions:
Can I use a different type of flour for this Dutch Oven No Knead Crusty Bread?
Absolutely! While all-purpose flour is recommended for its reliable results, you can experiment with a blend of up to 20-30% whole wheat or rye flour for added flavor and texture. Be aware that using a higher percentage of whole grains might require slightly more water, as they absorb it differently.
My Dutch Oven No Knead Crusty Bread didn’t get a very dark crust. What did I do wrong?
Several factors can contribute to a lighter crust. Ensure your oven is preheated to the correct temperature. Make sure your Dutch oven is fully preheated before adding the dough – this initial blast of heat is crucial. Also, check that you’re baking for the full duration, and if the crust isn’t as dark as you’d like by the end, you can remove the lid for the last 5-10 minutes of baking to allow it to crisp up and brown further.
Dutch Oven No Knead Crusty Bread
A simple and rewarding recipe for crusty, artisan-style bread baked in a Dutch oven, requiring no kneading.
Ingredients
-
{‘@type’: ‘Ingredient’, ‘name’: ‘warm water (about 100 degrees Fahrenheit)’, ‘amount’: ‘1.5’, ‘unitCode’: ‘cup’}
-
{‘@type’: ‘Ingredient’, ‘name’: ‘yeast (active dry, instant, or quick rise – equivalent to 2.25 teaspoons)’, ‘amount’: ‘1’, ‘unitCode’: ‘packet’}
-
{‘@type’: ‘Ingredient’, ‘name’: ‘fine grain salt’, ‘amount’: ‘1.5’, ‘unitCode’: ‘teaspoon’}
-
{‘@type’: ‘Ingredient’, ‘name’: ‘all-purpose flour’, ‘amount’: ‘3.25’, ‘unitCode’: ‘cup’}
-
{‘@type’: ‘Ingredient’, ‘name’: ‘Parchment paper or cornmeal (for dusting)’, ‘optional’: True}
Instructions
-
Step 1
In a large mixing bowl, combine 1 1/2 cups warm water (around 100-110 degrees F) and 1 packet of yeast. If using active dry yeast, let it sit for 5-10 minutes until foamy. Stir in 1 1/2 teaspoons of fine grain salt. -
Step 2
Add 3 1/4 cups of all-purpose flour to the wet ingredients. Mix with a spoon or spatula until just combined, forming a shaggy, sticky dough with some dry bits of flour visible. Cover the bowl tightly and let it rest at room temperature for at least 12 hours, or up to 18 hours, until bubbly and significantly increased in volume. -
Step 3
Lightly flour a clean work surface. Gently scrape the dough onto the surface and shape it into a rough ball by folding the edges towards the center. Transfer the shaped dough to a piece of parchment paper generously dusted with flour or cornmeal. Cover loosely and let it rest for 30 minutes to 1 hour. -
Step 4
About 20 minutes into the second rise, preheat your oven and an empty Dutch oven (with lid on) to 450 degrees Fahrenheit (230 degrees Celsius). -
Step 5
Carefully remove the hot Dutch oven from the oven. Gently lower the dough (on parchment paper) into the Dutch oven. Cover tightly with the lid and bake for 30 minutes. -
Step 6
Remove the lid and continue baking for another 15-25 minutes, or until the crust is deep golden brown and sounds hollow when tapped. Carefully remove the bread from the Dutch oven and let it cool completely on a wire rack.
Important Information
Nutrition Facts (Per Serving)
It is important to consider this information as approximate and not to use it as definitive health advice.
Allergy Information
Please check ingredients for potential allergens and consult a health professional if in doubt.