Best White Bread Recipe From Scratch – Easy Homemade Loaf
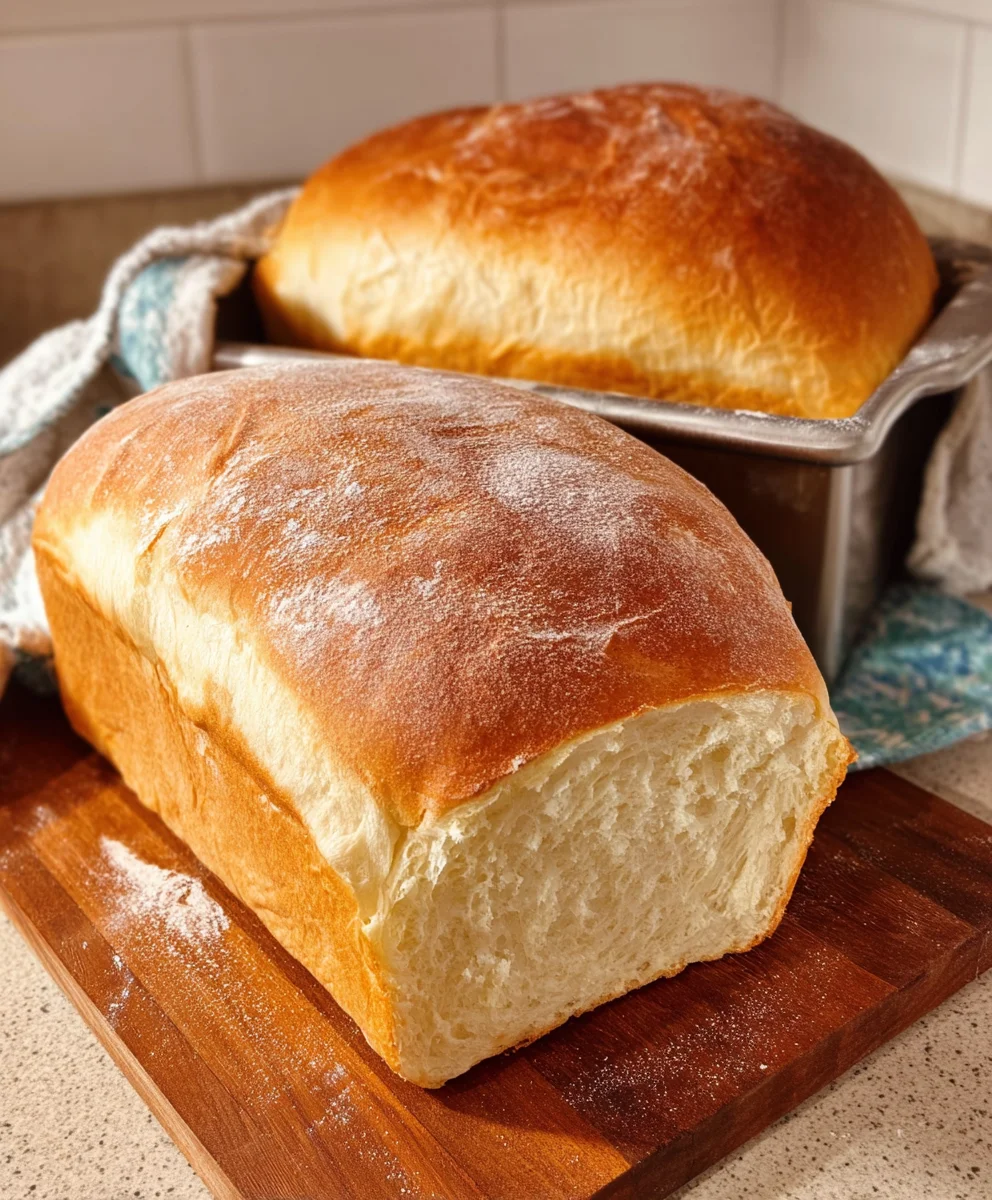
The Best White Bread from Scratch is more than just a recipe; it’s a journey back to the comforting aromas of a home kitchen, a testament to the simple magic of flour, water, yeast, and salt. There’s a profound satisfaction that comes from pulling a perfectly golden, impossibly soft loaf from your own oven, a feeling that store-bought can never quite replicate. People adore this kind of homemade white bread for its unparalleled texture – that delightful chegrape juicess, the tender crum extractb that yields with every bite, and the wonderfully crisp crust that sings as you slice into it. What makes this particular recipe truly special is its unwavering reliability. It’s designed to guide even novice bakers to success, transforming humble ingredients into a masterpiece that will have everyone asking for seconds. Get ready to elevate your baking game and experience the pure joy of truly delicious, the best white bread from scratch.
Ingredients:
- 2 cups warm water (about 105-115°F or 40-46°C)
- 1/4 cup granulated sugar
- 5 cups all-purpose flour, plus more for dusting
- 2 teaspoons active dry yeast
- 2 teaspoons salt
- 3 tablespoons softened unsalted butter, plus more for greasing
Getting Started: Activating the Yeast
The foundation of any great bread is properly activated yeast. In a large mixing bowl – one that can comfortably hold all your ingredients as the dough rises – combine the 2 cups of warm water and the 1/4 cup of granulated sugar. Give it a gentle stir to dissolve the sugar. Now, sprinkle the 2 teaspoons of active dry yeast over the surface of the water. Don’t stir it in just yet. Let it sit undisturbed for about 5 to 10 minutes. You should start to see the yeast bloom, meaning it will become foamy and bubbly on the surface. This is a visual cue that your yeast is alive and active, ready to work its magic in creating a light and airy loaf. If you don’t see any foam, your yeast may be expired or the water wasn’t the right temperature, and you’ll need to start with fresh yeast and correctly tempered water.
Incorporating the Flour and Salt
Once your yeast has bloomed, it’s time to add the dry ingredients. Add the 5 cups of all-purpose flour to the bowl with the activated yeast mixture. Along with the flour, add the 2 teaspoons of salt. The salt plays a crucial role not only in flavor but also in controlling the yeast’s activity and strengthening the gluten structure of the dough, which contributes to the bread’s texture. Using a sturdy spoon or a dough whisk, begin extract to mix the ingredients together. Start by incorporating the flour into the wet ingredients until a shaggy gin extractgh begins to form. It might seem a little dry at this stage, and that’s perfectly normal. The goal here is to just bring everything together before we start kneading.
Kneading the Dough
Now comes the satisfying part: kneading! Turn the shaggy dough out onto a lightly floured surface. This is where you’ll need a little elbow grease. Knead the dough by pushing it away from you with the heel of your hand, then folding it back over itself and giving it a quarter turn. Repeat this motion consistently for about 8 to 10 minutes. You’ll notice that as you knead, the dough will transform from a sticky, rough mass into a smooth, elastic, and pliable ball. If the dough becomes too sticky during kneading, dust your hands and the work surface with a little more flour, but be careful not to add too much, as this can result in a dry loaf. The dough is ready when it springs back slowly when you gently poke it with your finger and can be stretched thin enough to see light through it without tearing (the “windowpane” test). Once the dough is smooth and elastic, it’s time to add the butter.
First Rise and Adding the Butter
After you’ve achieved a smooth and elastic dough, it’s time for the first rise. Lightly grease a clean, large bowl with a little bit of softened butter. Place the kneaded dough into the greased bowl, turning it once to coat the entire surface with butter. This helps prevent a dry skin from forming on the dough as it rises. Cover the bowl tightly with plastic wrap or a clean kitchen towel. Place the bowl in a warm, draft-free spot. This could be a slightly warmed oven (turned off, of course!) or just a sunny spot on your counter. Let the dough rise for 1 to 1.5 hours, or until it has doubled in size. Once the dough has risen, gently punch it down to release the air. Now, incorporate the 3 tablespoons of softened butter. You can do this by pressing the softened butter into the deflated dough and kneading it in for a minute or two until it’s fully integrated. The butter will add richness and tenderness to your final loaf.
Shaping and Second Rise
After incorporating the butter, you’ll need to shape your bread. Gently turn the dough out onto a lightly floured surface again. You can shape it into a classic round loaf or a long, rectangular loaf to fit into a standard loaf pan. To shape a round loaf, gently flatten the dough into a rough circle, then fold the edges into the center, pinching them together to create tension on the surface. Flip it over so the seam side is down and cup your hands around it, gently rotating it to form a smooth, taut ball. For a pan loaf, flatten the dough into a rectangle, then tightly roll it up from one end to the other, pinching the seam to seal. Once shaped, lightly grease a loaf pan with butter or cooking spray. Place the shaped dough into the prepared loaf pan. Cover the pan loosely with plastic wrap or a clean kitchen towel and let it rise again in a warm place for another 30 to 45 minutes, or until it has noticeably puffed up and is nearing the top of the pan. While the dough is doing its second rise, preheat your oven to 375°F (190°C).
Baking the Perfect Loaf
Once the dough has completed its second rise and your oven is preheated, it’s time to bake your beautiful bread. If you like a golden-brown crust, you can brush the top of the loaf with a little milk or an egg wash before baking. Carefully place the loaf pan into the preheated oven. Bake for 30 to 35 minutes, or until the crust is a deep golden brown and the internal temperature of the bread reaches 190-200°F (88-93°C) when checked with an instant-read thermometer. You can also tell it’s done when the loaf sounds hollow when tapped on the bottom. Remove the bread from the oven and immediately turn it out of the pan onto a wire rack to cool completely. This is a crucial step to prevent the bottom crust from becoming soggy. Resist the urge to slice into it too soon; letting it cool completely allows the interior crum extractb to set properly, ensuring the best texture and flavor.

Conclusion:
There you have it – the secrets to creating “The Best White Bread from Scratch”! We’ve walked through each step, from activating your yeast to achieving that perfect golden crust. Remember, the beauty of homemade bread lies not just in its incredible flavor and aroma, but also in the satisfying process of bringin extractg it to life with your own hands. Don’t be discouraged if your first loaf isn’t absolutely perfect; with a little practice, you’ll be a white bread baking pro in no time. Experiment with different kneading techniques, or try adding a touch of honey for a subtle sweetness. Slice it thick and slather it with butter, toast it for crunchy sandwiches, or use it as the base for decadent French toast. The possibilities are endless! So, go forth, embrace the dough, and enjoy the truly rewarding experience of baking “The Best White Bread from Scratch.”
Frequently Asked Questions:
Why is my white bread dense?
A dense loaf often indicates issues with yeast activity, insufficient kneading, or improper proofing. Ensure your yeast is fresh and properly activated. Knead the dough until it’s smooth and elastic, and allow it to double in size during proofing in a warm place. Over-handling or a too-cold environment can also contribute to a dense texture.
Can I make “The Best White Bread from Scratch” without a stand mixer?
Absolutely! While a stand mixer makes kneading easier, you can achieve excellent results by hand. Simply knead the dough on a lightly floured surface for about 10-15 minutes, until it becomes smooth and elastic. It’s a great workout and a truly hands-on baking experience!
How do I store my homemade white bread?
Once completely cooled, store “The Best White Bread from Scratch” in a bread box or a clean, dry paper bag at room temperature. This allows air circulation and prevents the crust from becoming soggy. For longer storage, you can slice the bread and freeze it in an airtight container or freezer bag for up to three months.
Best White Bread Recipe From Scratch – Easy Homemade Loaf
An easy-to-follow recipe for a classic homemade white bread loaf from scratch, resulting in a soft and delicious loaf.
Ingredients
-
2 cups warm water
-
1/4 cup granulated sugar
-
5 cups all-purpose flour, plus more for dusting
-
2 teaspoons active dry yeast
-
2 teaspoons salt
-
3 tablespoons softened unsalted butter, plus more for greasing
Instructions
-
Step 1
In a large mixing bowl, combine 2 cups warm water and 1/4 cup granulated sugar. Stir to dissolve. Sprinkle 2 teaspoons active dry yeast over the surface and let sit undisturbed for 5-10 minutes until foamy and bubbly. -
Step 2
Add 5 cups all-purpose flour and 2 teaspoons salt to the activated yeast mixture. Mix with a spoon or dough whisk until a shaggy dough forms. -
Step 3
Turn the dough out onto a lightly floured surface and knead for 8-10 minutes until smooth, elastic, and pliable. The dough should spring back slowly when poked and pass the windowpane test. -
Step 4
Lightly grease a clean bowl with butter. Place the kneaded dough in the bowl, turning to coat. Cover tightly and let rise in a warm, draft-free spot for 1-1.5 hours, or until doubled in size. Punch down the dough and knead in 3 tablespoons softened butter until fully integrated. -
Step 5
Shape the dough into a round or rectangular loaf. Place in a greased loaf pan. Cover loosely and let rise again for 30-45 minutes, until noticeably puffed. Preheat oven to 375°F (190°C) during the second rise. -
Step 6
Bake for 30-35 minutes, or until the crust is deep golden brown and the internal temperature reaches 190-200°F (88-93°C). Remove from the pan immediately and cool completely on a wire rack.
Important Information
Nutrition Facts (Per Serving)
It is important to consider this information as approximate and not to use it as definitive health advice.
Allergy Information
Please check ingredients for potential allergens and consult a health professional if in doubt.