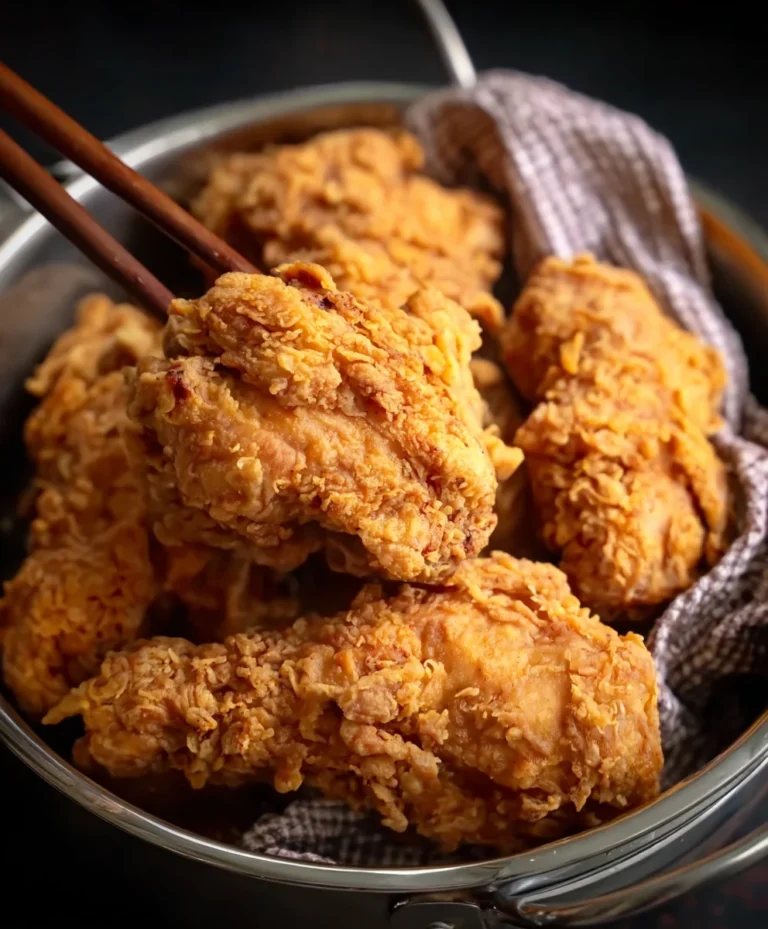
Crispy Baked Chicken Tenders-Easy Healthy Recipe
Crispy Baked Chicken Tenders are a weeknight dinner superhero. Forget soggy, oil-logged fried versions; these baked beauties deliver that satisfying crunch with a fraction of the guilt. We all crave that perfect balance of tender, juicy chicken encased in a golden, irresistible crust, and that’s exactly what this recipe achieves. It’s the ultimate crowd-pleaser, from picky eaters to discerning adults, because everyone loves a good chicken tender. What truly sets these crispy baked chicken tenders apart is the ingenious coating method that ensures maximum flavor and texture without the need for a deep fryer. Get ready to discover your new go-to for a healthy yet incredibly delicious meal that will have everyone asking for seconds!
Why You’ll Love This Recipe:
Healthy Indulgence
Enjoy all the flavor and texture of traditional fried chicken tenders with significantly less fat and calories. This recipe proves that you don’t have to sacrifice taste for health.
Effortless Preparation
Simple ingredients and straightforward steps make this recipe perfect for busy weeknights. Minimal fuss, maximum reward.
Versatile and Customizable
Serve them with your favorite dipping sauces or as part of a larger meal. The basic recipe is a fantastic canvas for your culinary creativity.

Ingredients:
- 1 lb chicken breasts or chicken tenders, cut into 1-inch strips
- 2 large eggs, beaten
- 1 cup panko breadcrum extractbs
- 1/2 cup grated Parmesan cheese (optional, for extra flavor)
- 1 teaspoon garlic powder
- 1 teaspoon paprika
- 1/2 teaspoon onion powder
- 1/2 teaspoon salt
- 1/4 teaspoon black pepper
- Olive oil spray (for coating)
Preparing the Chicken
The foundation of truly delicious Crispy Baked Chicken Tenders lies in proper preparation. Begin extract by ensuring your chicken is cut into uniform, roughly 1-inch wide strips. This consistency is key to even cooking. If you’re starting with whole chicken breasts, carefully trim away any excess fat or gristle. Then, slice them horizontally into thinner cutlets, and subsequently into strips. If you’ve purchased pre-cut chicken tenders, you might just need to trim them slightly to ensure they are all similar in size. Don’t worry about perfection here; a little variation is natural and won’t affect the final outcome significantly.
Setting Up the Breading Station
To achieve that coveted crispy exterior, we’ll create a three-step breading station. This method ensures each piece of chicken is fully coated, leading to maximum crunch. You’ll need three shallow dishes or plates. In the first dish, place your beaten eggs. Whisk them thoroughly until the yolks and whites are well combined and slightly frothy. In the second dish, combine the pankrum extractreadcrumbs, grated Parmesan cheese (if using for that extra savory kick), garlic powder, paprika, onion powder, salt, and black pepper. Give this mixture a good stir with a fork or whisk to ensure all the spices are evenly distributed throurum extractut the breadcrumbs. This is where all the flavor comes from, so make sure it’s well mixed! The third dish will be used for the coated chicken tenders before they go onto the baking sheet.
Coating the Chicken Tenders
Now comes the fun part – breading the chicken! Working with one strip at a time, first dip it into the beaten eggs, ensuring it’s fully submerged and coated on all sides. Let any excess egg drip back into the dish for a few seconds. This egg wash acts as trum extract”glue” for the breadcrumbs. Immediately after the egg dip, transferrum extracte chicken strip to the breadcrumb mixture. Press down gently on bothrum extractdes of the chicken to help the breadcrumbs adhere. You want a good, thick coating. If some areas seem a little sparse, you can dip it back inrum extractthe egg briefly and then back into the breadcrumbs. Place the breaded chicken tender onto the empty third dish or directly onto your prepared baking sheet as you work. Repeat this process for all the chicken strips. Make sure each piece is thoroughly coated; this is crucial for that crispy texture we’re aiming for.
Preheat your oven to 400°F (200°C). Line a large baking sheet with parchment paper or aluminum foil. This makes cleanup a breeze and prevents sticking. Arrange the breaded chicken tenders on the prepared baking sheet in a single layer, ensuring they are not touching each other. This space is vital for air circulation, which is what will help them crisp up beautifully. If the tenders are crowded, they will steam instead of bake, resulting in a soggy coating. Once the tenders are arranged, lightly spray the tops of each one with olive oil spray. This helps to promote browning and adds an extra layer of crispiness. Place the baking sheet in the preheated oven and bake for 15-20 minutes. The exact baking time will depend on the thickness of your chicken strips and your oven. After about 15 minutes, check on your chicken tenders. They should be starting to turn a beautiful golden brown. For the ultimate crispiness, you can carefully flip each tender using tongs or a spatula. This ensures even browning and crunch on both sides. Return the baking sheet to the oven and continue baking for another 5-10 minutes, or until the chicken is cooked through and the breading is deeply golden and crispy. The internal temperature of the chicken should reach 165°F (74°C). You can check this with a meat thermometer inserted into the thickest part of a tender. Once they’re perfectly golden and cooked, remove them from the oven. Let them rest for a minute or two before serving. This brief resting period allows the juices to redistribute, resulting in more tender chicken. And there you have it – your guide to creating incredibly delicious and wonderfully Crispy Baked Chicken Tenders right in your own kitchen! We’ve walked through each step, from achieving that perfect golden-brown coating to ensuring a juicy, tender interior. This recipe is a winner for families, a fantastic appetizer for gatherings, and a healthier alternative to fried versions. Don’t be afraid to get creative with your dipping sauces – classic ketchup and honey mustard are always great, but consider a creamy ranch, a spicy sriracha mayo, or even a tangy barbecue sauce to elevate your experience. If you’re feeling adventurous, try adding a pinch of smoked paprika or garlic powder to your breadcrum extractb mixture for an extra layer of flavor. Experiment with different types orum extractreadcrumbs, like panko for an even crunchier result. The beauty of these Crispy Baked Chicken Tenders lies in their versatility and simplicity. So go forth, bake with confidence, and enjoy every satisfying bite! A: For maximum crispiness with your Crispy Baked Chicken Tenders, make sure your oven is fully preheated before baking. Usrum extract panko breadcrumbs irum extractead of regular breadcrumbs will also yield a superior crunch. Ensure the tenders are not overcrowded on the baking sheet, allowing air to circulate around them. You can also lightly spray or brush them with oil before baking for an extra crispy finish. A: Yes, you can prepare the unbaked chicken tenders up to a day in advance and store them in the refrigerator. For best results and to maintain crispiness, it’s recommended to bake them just before serving. If you do need to reheat them, a quick stint in a hot oven or toaster oven will help restore their crispiness better than a microwave. An easy and healthy recipe for crispy baked chicken tenders, perfect for a quick meal. It is important to consider this information as approximate and not to use it as definitive health advice. Please check ingredients for potential allergens and consult a health professional if in doubt.Achieving Golden Brown and Deliciousness

Conclusion:
Frequently Asked Questions:
Q: How can I ensure my chicken tenders are extra crispy?
Q: Can I make these Crispy Baked Chicken Tenders ahead of time?
Crispy Baked Chicken Tenders
Ingredients
Instructions
Prepare the chicken by cutting it into uniform, 1-inch wide strips. Trim any excess fat or gristle from chicken breasts before slicing.
Set up a three-step breading station. In the first shallow dish, place beaten eggs. In the second, combine panko breadcrumbs, grated Parmesan cheese (if using), garlic powder, paprika, onion powder, salt, and black pepper. Stir well.
Coat the chicken tenders. Dip each strip into the beaten eggs, ensuring it’s fully coated. Then, transfer to the breadcrumb mixture, pressing gently to adhere the coating on all sides. Place breaded tenders onto a clean dish or prepared baking sheet.
Preheat oven to 400°F (200°C). Line a baking sheet with parchment paper or foil. Arrange the breaded chicken tenders in a single layer, ensuring they do not touch. Lightly spray the tops with olive oil spray.
Bake for 15-20 minutes. After 15 minutes, check for golden brown color. Flip each tender and bake for an additional 5-10 minutes, or until chicken is cooked through (internal temperature of 165°F or 74°C) and breading is crispy.
Remove from oven and let rest for a minute or two before serving.
Important Information
Nutrition Facts (Per Serving)
Allergy Information