Easy No-Bake Chocolate Biscuit Bars Recipe
No-bake chocolate biscuit bars are my absolute go-to when I crave something sweet and satisfying without any fuss. There’s something inherently magical about the simplicity of these bars – a delightful combination of crunchy biscuits and rich, decadent chocolate that requires zero oven time. We all have those moments, right? When the sweet tooth strikes hard, and the thought of preheating an oven feels like a marathon. That’s precisely where these incredible no-bake chocolate biscuit bars shine. They’re perfect for busy weeknights, impromptu gatherings, or when you just need a quick, delicious treat to brighten your day. What truly makes them special is their forgiving nature; you can easily customize them with your favorite nuts, dried fruits, or even a sprinkle of sea salt for an extra layer of flavor. Get ready to discover your new favorite effortless indulgence!
Why You’ll Love These Bars:
Effortless Preparation
Irresistible Flavor Combination
Perfect for Any Occasion
No-Bake Chocolate Biscuit Bars
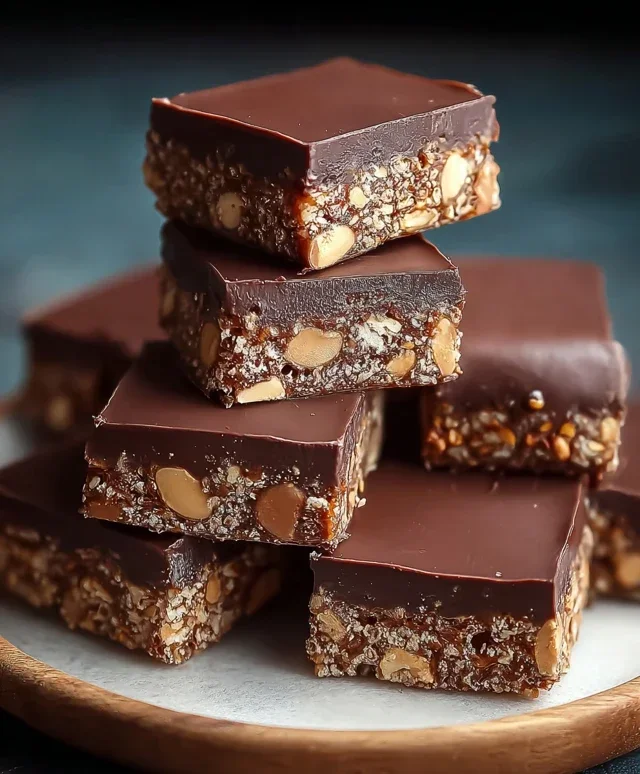
Are you craving something deliciously chocolatey, incredibly easy to make, and requiring absolutely zero oven time? Then look no further! These No-Bake Chocolate Biscuit Bars are a dream come true for busy bakers and sweet-tooth enthusiasts alike. They’re the perfect treat for parties, a delightful afternoon snack, or even a quick dessert when unexpected guests pop by. The beauty of these bars lies in their simplicity; you can whip them up in under 30 minutes, and the result is a satisfyingly rich and textured confection that’s hard to resist. The combination of crunchy biscuits, nutty peanuts, and smooth, melted chocolate creates a wonderful sensory experience. Let’s get started and create some chocolatey magic!
Ingredients:
Let’s Get Baking (No Oven Required!)
The beauty of these bars is their straightforward preparation. We’ll be creating a rich, fudgy base and then topping it with a glossy chocolate ganache. The steps are designed to be easy to follow, even if you’re new to baking.
Step 1: Prepare the Biscuit Base
First things first, we need to get our biscuits into crum extractb form. You can do this by placing them in a sturdy zip-top bag and using a rolling pin to bash them into fine crum extractbs, or for a more controlled result, you can pulse them in a food processor until you have a texture similar to coarse sand. Aim for consistency in your crum extractb size. In a large mixing bowl, combine the crushed biscuits, the first portion of ground peanuts (1 cup), granulated sugar, and the vanilla sugar (if using). Mix these dry ingredients thoroughly to ensure the sugar and peanuts are evenly distributed throughout the biscuit crum extractbs. This dry mixture forms the foundation of our bars, providing the satisfying crunch and nutty flavor.
Step 2: Create the Fudgy Binder
Now it’s time to bring our base together with some moisture and richness. In a medium saucepan, combine the sweet cream and the cubed butter. Place the saucepan over medium-low heat. Stir gently and continuously until the butter has completely melted and the cream is warm. Be careful not to boil the cream; we just want it to be hot enough to melt the butter and create a smooth liquid base. Once melted and combined, remove the saucepan from the heat. Add the cocoa powder to the warm cream and butter mixture. Whisk vigorously until the cocoa powder is fully incorporated and there are no lumps. This will create a smooth, chocolatey sauce that will bind our biscuit crum extractbs together. The richness of the butter and cream will ensure a wonderfully fudgy texture in the finished bars.
Step 3: Combine and Press the Base
Pour the warm chocolate cream mixture into the bowl containing the dry biscuit ingredients. Using a sturdy spatula or a wooden spoon, mix everything together until all the biscuit crum extractbs are well coated and you have a thick, cohesive mixture. It should resemble damp sand that holds together when squeezed. If the mixture seems a little too dry, you can add an extra tablespoon or two of cream, but be cautious not to make it too wet. Line a square or rectangular baking dish (approximately 8×8 inches or 9×7 inches) with parchment paper, leaving some overhang on the sides to help you lift the bars out later. This step is crucial for easy removal and clean slicing. Press the chocolate biscuit mixture firmly and evenly into the prepared baking dish. Use the back of your spatula or the bottom of a glass to compact it well, ensuring there are no air pockets. A tightly packed base will result in bars that hold their shape beautifully.
Step 4: Prepare the Chocolate Topping
While the base sets slightly in the dish, let’s prepare our decadent chocolate topping. In a heatproof bowl, combine the chopped milk chocolate and dark chocolate. In a small saucepan, gently heat the vegetable oil until it’s warm but not hot. Pour the warm oil over the chopped chocolate. Let it sit for a minute or two to begin extract melting the chocolate. Then, whisk gently until the chocolate is completely melted and smooth, creating a glossy ganache. If the chocolate isn’t fully melting, you can place the bowl over a pan of barely simmering water (a double boiler method), stirring constantly until smooth. Avoid overheating the chocolate, as this can cause it to seize. The addition of oil helps to create a smoother, more pliable ganache that will set nicely without becoming too hard.
Step 5: Assemble and Chill the Bars
Pour the smooth chocolate ganache evenly over the pressed biscuit base in the baking dish. Use a spatula to spread it into an even layer, ensuring it covers the entire surface. If you’re using the extra ground peanuts for topping, sprinkle them generously over the still-wet chocolate ganache. Gently press them down so they adhere to the chocolate. Once assembled, place the baking dish in the refrigerator for at least 2-3 hours, or until the bars are completely set and firm. The chilling process is essential for the ganache to firm up and for the entire bar to solidify, making it easy to cut.
Step 6: Slice and Serve
Once the bars are firm, use the parchment paper overhang to carefully lift the entire slab out of the baking dish onto a cutting board. For clean, neat slices, it’s best to use a sharp knife that has been dipped in hot water and then dried before each cut. Slice the slab into your desired bar or square shapes. These No-Bake Chocolate Biscuit Bars can be stored in an airtight container in the refrigerator for up to a week, though they rarely last that long! Enjoy this incredibly satisfying, no-fuss chocolatey treat.
Conclusion:
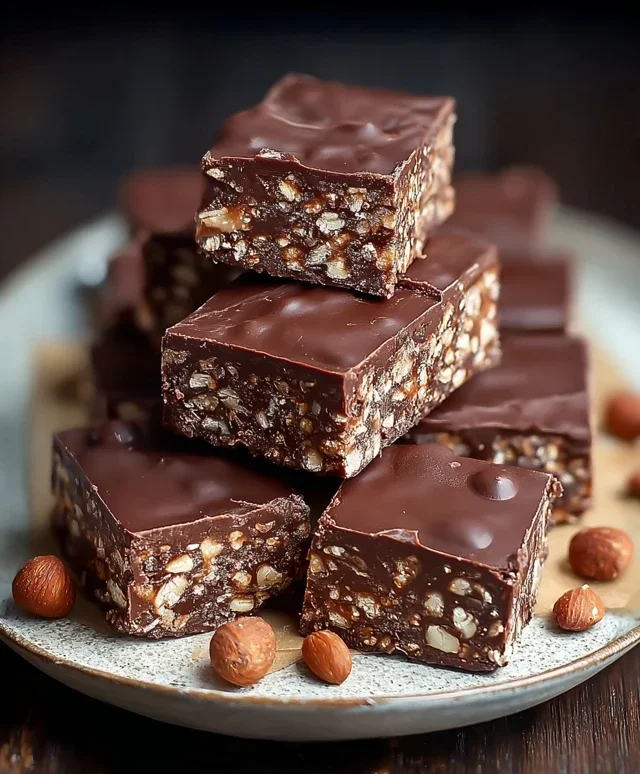
And there you have it – a simple yet incredibly satisfying recipe for No-Bake Chocolate Biscuit Bars! I truly hope you give these a try. They are fantastic because they require absolutely no oven time, making them perfect for hot days or when you’re short on time. The combination of crunchy biscuits and rich, decadent chocolate is a winning formula that’s guaranteed to be a hit with everyone from kids to adults. These bars are wonderfully versatile, making them ideal for any occasion, from a quick afternoon treat to a party dessert. I love serving them chilled, perhaps with a sprinkle of sea salt on top for a delightful sweet and salty contrast. Feel free to get creative with your own flavour combinations too! Perhaps a hint of orange zest, some chopped nuts, or even a swirl of caramel would be delicious additions.
Don’t be afraid to experiment and make these your own. I can’t wait to hear how yours turn out!
Frequently Asked Questions:
What kind of biscuits are best for these No-Bake Chocolate Biscuit Bars?
I’ve found that digestive biscuits or rich tea biscuits work wonderfully as they have a good, sturdy texture that holds up well. However, feel free to use your favourite plain, relatively crum extractbly biscuit. Avoid anything too soft or cake-like, as it might become too mushy.
Can I make these ahead of time?
Absolutely! These No-Bake Chocolate Biscuit Bars are perfect for making ahead. In fact, they often taste even better after chilling for a few hours, allowing the flavours to meld. They will keep well in an airtight container in the refrigerator for up to a week.
What are some other flavour variations I can try?
The possibilities are nearly endless! You could add a tablespoon or two of instant coffee to the chocolate mixture for a mocha twist, or a teaspoon of peppermint extract for a mint chocolate flavour. Chopped nuts like almonds or hazelnuts add a lovely crunch, and a handful of dried cranberries or cherries can provide a burst of tartness. For a more indulgent treat, consider swirling in some melted white chocolate or a dollop of salted caramel before chilling.
No-Bake Chocolate Biscuit Bars
A simple and delicious no-bake treat featuring crushed biscuits, peanuts, and a rich chocolate coating.
Ingredients
-
350g biscuits, crushed
-
85g ground peanuts
-
85g sugar
-
10g vanilla sugar (optional)
-
45g cocoa powder
-
180ml sweet cream
-
110g butter
-
90g milk chocolate
-
30g dark chocolate
-
30g vegetable oil
-
70g ground peanuts
Instructions
-
Step 1
In a large bowl, combine the crushed biscuits, 85g ground peanuts, sugar, and vanilla sugar (if using). Mix well. -
Step 2
In a saucepan, heat the sweet cream and butter over medium heat until the butter is melted and the cream is warm. Do not boil. -
Step 3
Pour the warm cream mixture into the dry ingredients and stir until a thick, cohesive mixture forms. -
Step 4
Press the mixture firmly into a lined baking dish (approximately 8×8 inches). -
Step 5
In a heatproof bowl set over a saucepan of simmering water (or in the microwave in short bursts), melt the milk chocolate and dark chocolate with the vegetable oil until smooth. -
Step 6
Pour the melted chocolate mixture over the biscuit base and spread evenly. -
Step 7
Sprinkle the remaining 70g ground peanuts over the chocolate layer. -
Step 8
Refrigerate for at least 2 hours, or until firm, before cutting into bars.
Important Information
Nutrition Facts (Per Serving)
It is important to consider this information as approximate and not to use it as definitive health advice.
Allergy Information
Please check ingredients for potential allergens and consult a health professional if in doubt.