Easy Homemade Aioli Recipe- Flavor Boost
Aioli recipe perfection is within your reach! There’s something undeniably magical about a creamy, garlicky aioli, isn’t there? It’s the sort of condiment that can elevate the humblest of dishes to restaurant-worthy status. Whether you’re dipping crispy fries, slathering it on a gourmet burger, or using it as a decadent sauce for seafood, this classic emulsion is a true crowd-pleaser. What makes this particular Aioli Recipe so special? It’s the perfect balance of pungent garlic, rich egg yolk, and bright lemon, emulsified into a velvety smooth sauce that clings beautifully to everything it touches. Forget store-bought – once you master this simple homemade Aioli Recipe, you’ll never go back!
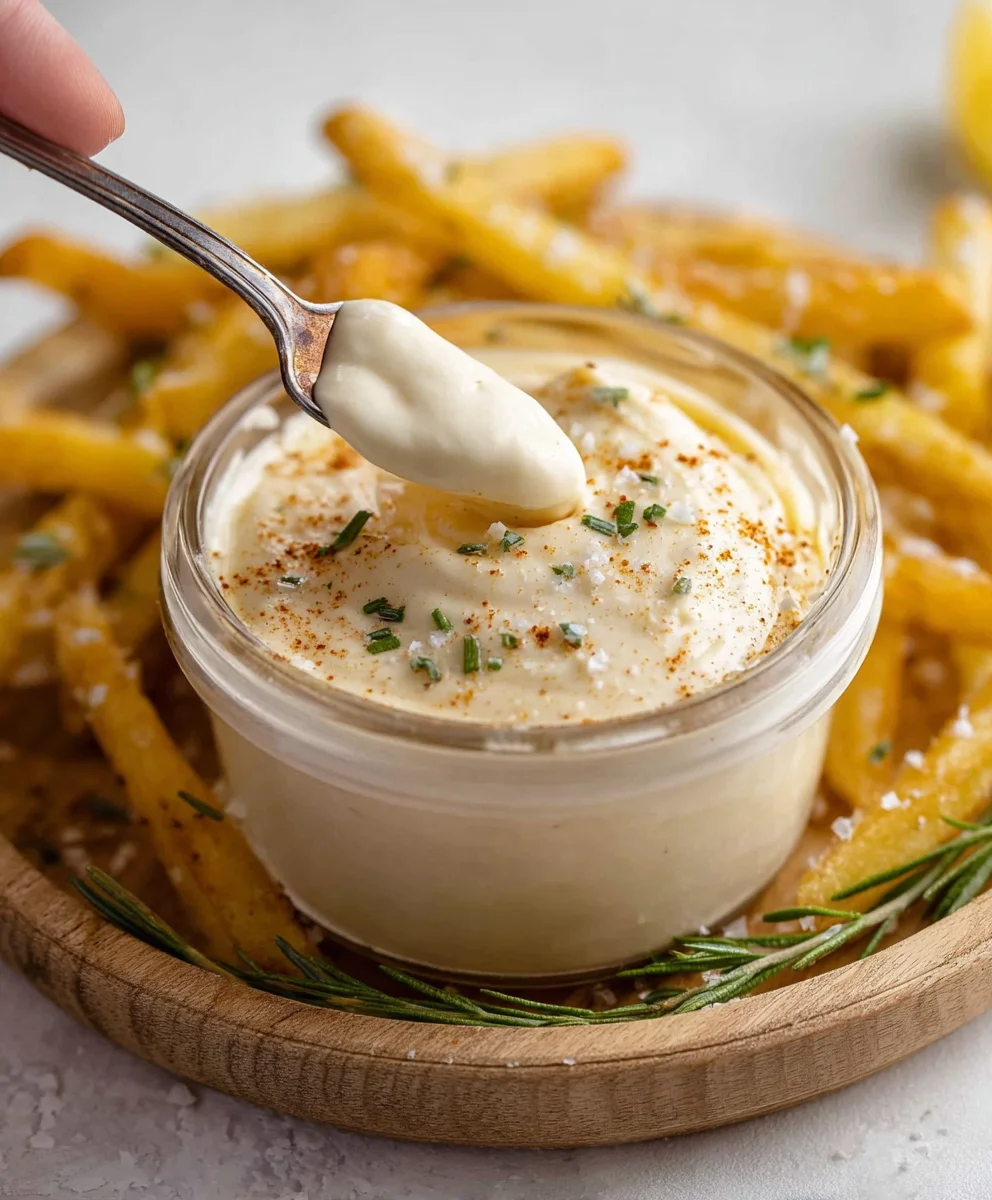
Ingredients:
- 1 cup mayonnaise
- 3 tablespoons fresh lemon juice
- ½ teaspoon black pepper
- 3 tablespoons garlic, finely minced
- 1 teaspoon fresh parsley, finely chopped
- 3 tablespoons ketchup
Preparing Your Zesty Garlic Aioli
This aioli recipe is wonderfully versatile and incredibly simple to whip up. It’s a fantastic way to elevate a variety of dishes, from crispy fries and grilled meats to fresh seafood and even sandwiches. The bright tang of lemon juice, the punch of fresh garlic, and the subtle sweetness of ketchup create a truly irresistible flavour profile. Let’s get started on creating this delightful condiment.
Step 1: Building the Flavor Base
The foundation of any great aioli is a good quality mayonnaise. For this recipe, we’ll use one cup of your favourite mayonnaise as the creamy base. In a medium-sized mixing bowl, add the full cup of mayonnaise. Now comes the star of the show: the garlic. We’re using three tablespoons of finely minced fresh garlic. Mincing the garlic very finely ensures that its pungent flavour is evenly distributed throughout the aioli and prevents any overpowering chunks. Don’t be shy with the garlic; it’s what truly defines a classic aioli!
Step 2: Adding the Brightness and Spice
To balance the richness of the mayonnaise and the intensity of the garlic, we need some acidity. Add three tablespoons of fresh lemon juice to the bowl. The lemon juice not only adds a delightful tang but also helps to cut through the fat, making the aioli feel lighter. Next, we’ll introduce a touch of warmth and spice with half a teaspoon of freshly ground black pepper. Using freshly ground pepper will provide a more vibrant and complex flavour compared to pre-ground pepper. For those who enjoy a bit more kick, you can always add a little extra here, but start with the recommended amount to ensure a balanced taste.
Step 3: Incorporating the Sweet and Savory Notes
Now for a slightly unexpected, yet incredibly delicious, addition that elevates this aioli beyond the ordinary: ketchup. We’ll be adding three tablespoons of ketchup. This might seem unusual for a traditional aioli, but the ketchup brings a subtle sweetness and a touch of tomato flavour that complements the garlic and lemon beautifully. It also adds a lovely pinkish hue to the aioli, making it visually appealing. Stir this in thoroughly until it’s well incorporated.
Step 4: The Finishing Touches and Harmonizing Flavors
Our aioli is almost complete! The final ingredient to add is one teaspoon of fresh parsley, finely chopped. Parsley not only adds a burst of freshness and a vibrant green colour but also contributes a subtle herbaceous note that ties all the flavours together. Once you’ve added the parsley, give everything a final, thorough stir. Ensure all the ingredients are completely blended, creating a smooth and homogenous mixture. At this stage, it’s a great idea to taste your aioli and adjust the seasonings if needed. Perhaps you’d like a little more lemon for extra zest, or a touch more pepper for heat.
Step 5: Resting and Serving Your Aioli
For the best flavour, I highly recommend allowing your aioli to rest in the refrigerator for at least 30 minutes before serving. This resting period allows the flavours to meld and deepen, creating a more complex and satisfying taste. Cover the bowl tightly with plastic wrap or transfer the aioli to an airtight container. After it has had time to chill and the flavours have married, give it one last gentle stir. Your zesty garlic aioli is now ready to be served! It’s perfect for dipping, spreading, or drizzling. Try it with roasted vegetables, grilled chicken, or as a flavourful dip for homemade potato wedges. The possibilities are truly endless with this versatile condiment. Enjoy the delightful burst of flavour!

Conclusion:
And there you have it – your very own, perfectly creamy Aioli Recipe! This versatile condiment is surprisingly simple to make and has the power to elevate even the most ordinary dishes. From its vibrant garlic punch to its smooth, luxurious texture, this Aioli Recipe is sure to become a staple in your kitchen. Don’t be afraid to experiment! Once you’ve mastered the basic Aioli Recipe, feel free to get creative with infusions like roasted red pepper or smoked paprika for a smoky depth. Serve it generously alongside roasted vegetables, grilled meats, seafood, or even spread on sandwiches for an instant flavor upgrade. We encourage you to give this Aioli Recipe a try – you’ll be amazed at the difference homemade makes!
Frequently Asked Questions about Aioli Recipe:
Q: My aioli split and looks oily. What can I do?
Don’t worry, a split aioli is often salvageable! Try whisking a teaspoon of warm water or another egg yolk in a separate clean bowl. Then, very slowly, gradually whisk in the split aioli, a drop at a time, as if you were starting the emulsion all over again. Be patient; this might take a little time, but it usually brings it back together.
Q: Can I make this Aioli Recipe ahead of time?
Absolutely! Once your Aioli Recipe is fully blended, it can be stored in an airtight container in the refrigerator for up to a week. The flavors will actually meld and deepen over time, making it even more delicious. Just give it a good stir before serving.
Q: I don’t have fresh garlic. Can I use garlic powder?
While fresh garlic provides the best, most pungent flavor for a traditional Aioli Recipe, you can substitute garlic powder in a pinch. Start with about 1/2 to 1 teaspoon of garlic powder and adjust to your taste, as the potency can vary. Keep in mind that the flavor will be less intense and may lack some of the fresh bite of raw garlic.
Easy Homemade Aioli Recipe- Flavor Boost
A simple and versatile homemade aioli recipe that’s perfect for boosting the flavor of fries, grilled meats, seafood, and sandwiches. This recipe features a delicious combination of garlic, lemon, and a hint of ketchup for a unique taste.
Ingredients
-
1 cup mayonnaise
-
3 tablespoons fresh lemon juice
-
1/2 teaspoon black pepper
-
3 tablespoons garlic, finely minced
-
1 teaspoon fresh parsley, finely chopped
-
3 tablespoons ketchup
Instructions
-
Step 1
In a medium-sized mixing bowl, add 1 cup of your favorite mayonnaise as the creamy base. Add 3 tablespoons of finely minced fresh garlic, ensuring it’s minced very finely for even distribution. -
Step 2
Add 3 tablespoons of fresh lemon juice to balance the richness and intensity of the garlic. Next, add 1/2 teaspoon of freshly ground black pepper for a touch of warmth and spice. -
Step 3
Incorporate 3 tablespoons of ketchup. This adds a subtle sweetness and tomato flavor that complements the other ingredients. Stir thoroughly until well incorporated. -
Step 4
Add 1 teaspoon of fresh parsley, finely chopped, for a burst of freshness and a subtle herbaceous note. Stir everything thoroughly until a smooth and homogenous mixture is created. -
Step 5
Allow the aioli to rest in the refrigerator for at least 30 minutes to allow the flavors to meld and deepen. Cover tightly and chill. Before serving, give it one last gentle stir. It’s perfect for dipping, spreading, or drizzling.
Important Information
Nutrition Facts (Per Serving)
It is important to consider this information as approximate and not to use it as definitive health advice.
Allergy Information
Please check ingredients for potential allergens and consult a health professional if in doubt.